Handspun Yarn Creates Handwoven Art Piece
Do you have in your stash a skein of yarn that seems too precious to be used? Well, it was the case for me! I had a beautiful bundle of handspun merino yarn that I cherished for the longest time. It felt wrong to use in a project that wouldn’t showcase its beauty. Eventually, I realized that this yarn deserved a place on my wall! This is how the idea to use this handspun yarn to create a handwoven art piece became a reality.
For disclaimer, links included on this page might be affiliate links. This means that if you purchase a product or service with the links that I provide, I may receive a small commission. Please note that there is no additional charge to you. This is just a way for me to keep making this content. Thank you for your support!
The Frame
Before planning the project, I had to find a frame to put the cloth in. This would then dictate the dimensions of the project. I found a frame at IKEA’s “As-is” section for a few dollars. I’m not sponsored by Ikea, but I find it important to say that it’s a good place to find frame deals!
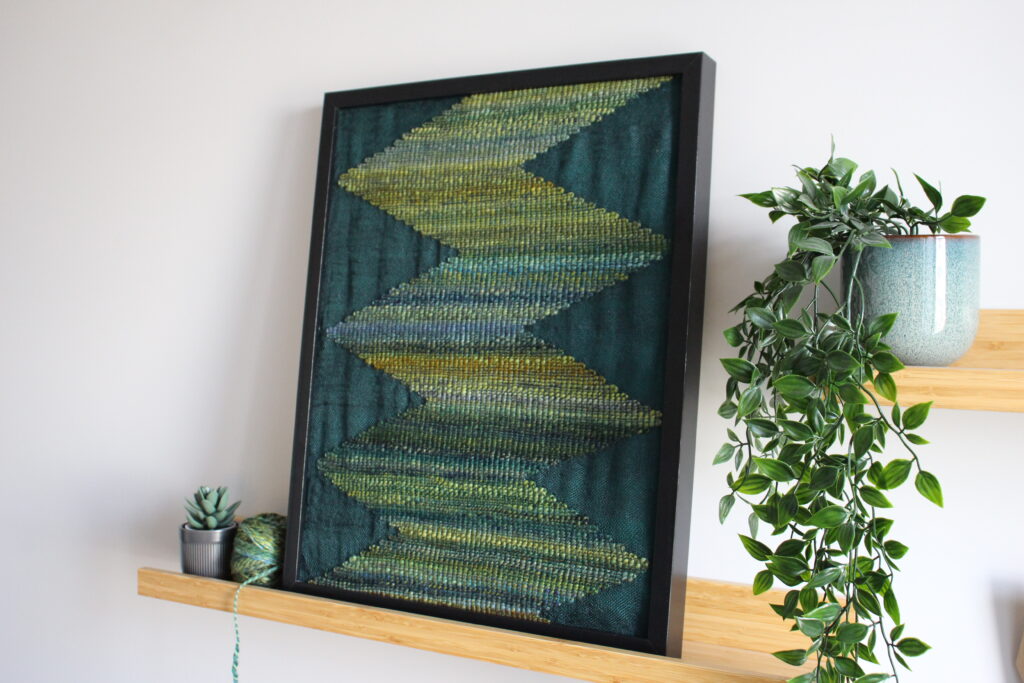
Also, an important criteria for me when choosing the frame was the location of the picture. Some frames have the picture right at the front and some have them at the back, leaving a gap. I wanted the first option, because I knew that I would remove the transparent cover and I wanted the cloth to be right there and standing out.
A plus is that the frame already came in black, so I didn’t have to paint it!
The Warp Yarn
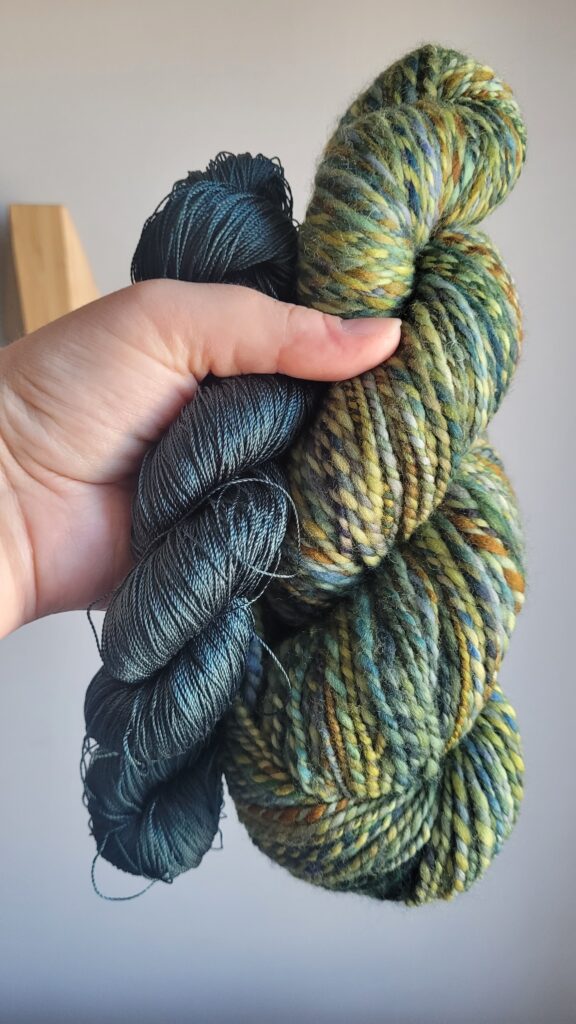
For the warp, as used an equally precious yarn, which was some fine silk yarn that I bought during a previous trip to Japan. The instructions are in Japanese, so I’m not really sure what the weight of the yarn is. To my eyes, it seems really fine. The color is dark teal, which is probably one of my favorite colors.
Thank You Patreons
As a side note, the choice of the warp yarn was not made by me alone! I initially had 2 options and I put them up to a vote on my Patreon’s page. The dark teal yarn received the largest number of vote. I’m glad I followed my Patreons’ choice, because the projet turned out beautifully! If you wish to be part of the next vote, make sure to visit my page. Here’s the link:https://www.patreon.com/c/curly_n_yarny
The Warp Parameters
Since that the silk yarn is so fine, I used my 15 DPI heddle and I singled the threads in the heddle. This means that I had 15 ends per inch. My frame was 40cm (16”) wide and I wanted to have a little bit of extra width on the project in order to be able to attach it to the cardboard. I figured that a width of 50cm (20”) should be enough to allow for draw in and setup. I total, the project had 300 ends.
The Warp Dimension
For the length of the project, I measured that my frame was 50cm (20”) long. Again, I considered for shrinkage and the need to fix the piece behind the frame. I figured that I would want to weave for 70cm (28”) plus a 20cm (8”) for tests and trials at the beginning. I also had to consider waste yarn. In total, I warped a length of 1m35 (54”).
The Weft Yarns
During the project, I used a technique that used a pick-up stick and supplementary weft (more on the technique later). This means that I had two weft yarns.
The first one, the structural yarn, was the same as the warp: fine dark teal silk yarn.
The second one, the pattern yarn, was the beautiful handspun merino yarn. This yarn was gifted to me by a friend.
Important Note
I feel the need to mention that when weaving projects that will be exposed to the sun, it’s important to consider that the colors might changer over time. There exists specialised yarn that have been subject to a treatment that makes them resistant to the sun destructive light. However, I did not used such yarns. This project is solely for my own use and I fully accept the fact that the colors might fade over time.
The Tools
I decided to make my this handwoven art piece using my Ashford rigid heddle loom that is 32” (80cm) wide. If you are looking for the same loom and are in the US, The Woolery has it! Here’s their website: https://woolery.com/ashford-rigid-heddle-loom.html?aff=214
I also used 1 pick-up stick to create an interesting pattern. I used a stick that was a bit longer than 32” (80cm). The Woolery also has pick-up sticks just like mine. Here’s the link: https://woolery.com/ashford-pickup-stick.html?aff=214
The Pick-up Stick Pattern
The whole pattern is basically a wave of yarn going back and forth from left to right. This stunning effect was made using a pick-up stick and supplementary weft.
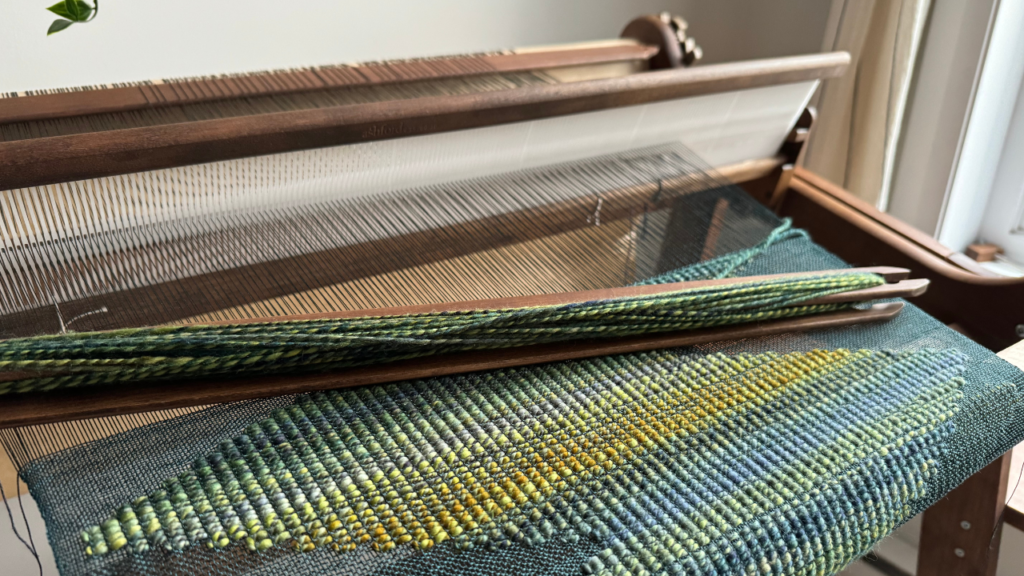
Fist of all, I inserted the pick-up stick in the middle of the project. I picked-up only a section that was about 1/3 of the whole width. Honestly, I didn’t count how many threads there was. I really just eyed ball what looked right. While I was inserting the pick-up stick, I followed a sequence of pick 1, skip 1 across the whole section. This is also done while the heddle is in the down position.
The Weaving
The weaving of the pattern was done in an 8-steps sequence.
Decreases
- Weave 1 pick with the silk yarn in the UP position
- Weave 1 pick with the silk yarn in the DOWN position
- Move the pick-up stick in order to create a decrease (this will eventually create the shape of the wave). To do so, on the opposite side of the handspun working thread, carefully remove two threads that are picked-up by the stick.
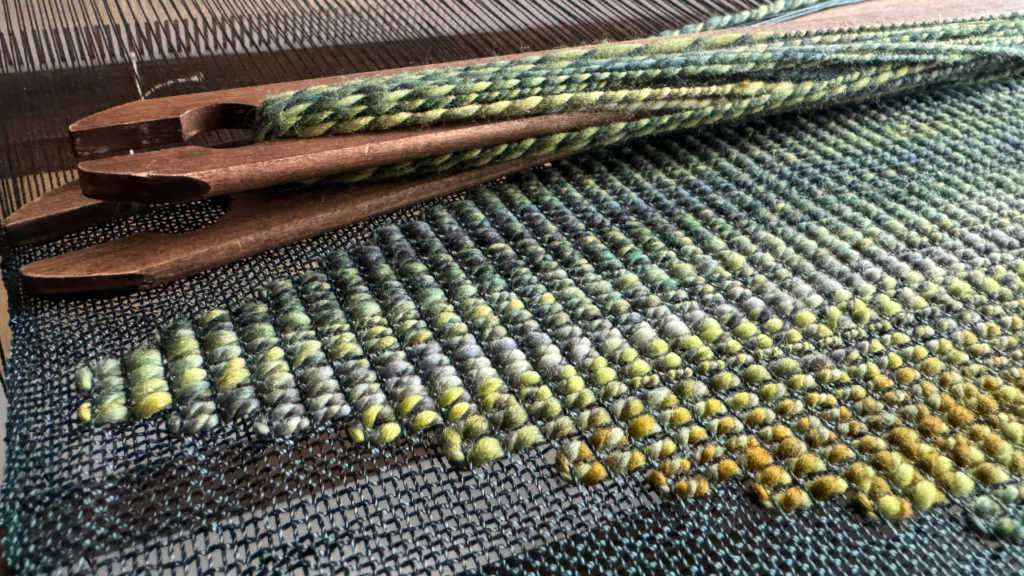
- Put the heddle into the neutral position. Flip the pick-up stick on its side to create a new shed. Weave one pick with the supplementary weft (handspun merino yarn) in the shed created.
Increases
- Weave 1 pick with the silk yarn in the UP position
- Weave 1 pick with the silk yarn in the DOWN position
- Move the pick-up stick in order to create an increase (this will eventually create the shape of the wave). To do so, on the opposite side of the handspun working thread, carefully pick up two more warp threads with the stick. This must follow the same sequence as before, which means: skip 1, pick 1, skip 1, pick 1.
- Put the heddle into the neutral position. Flip the pick-up stick on its side to create a new shed. Weave one pick with the supplementary weft (handspun merino yarn) in the shed created.
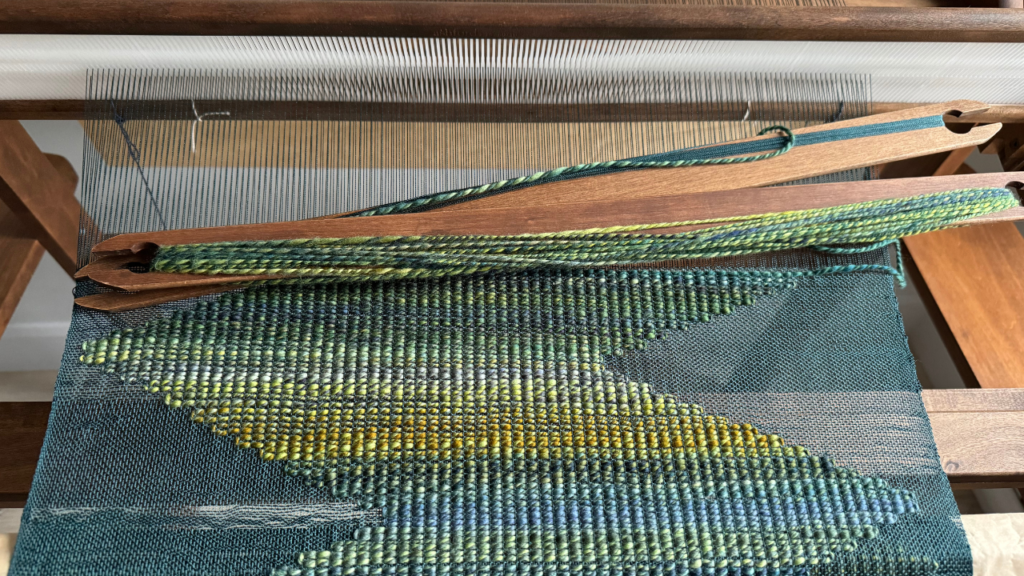
I repeated those eight steps all the way through the weaving of the project! The only exception was when I reached the edge of the woven piece. Then, I had to create the head of the wave.
The Head of the Wave
When the weaving of the wave reached the edge of the project, it was time to create the head of the wave. It’s important to note that I didn’t want the wave to go all the way to the edge. I stopped doing the increases when there was about 16 warp threads left (so about one inch). Then, I kept the pick-up stick in the exact same position for the next three picks that required it. I still did the normal picks with the silk yarn. In other words, here’s the sequence:
- Weave 1 pick with the silk yarn in the UP position
- Weave 1 pick with the silk yarn in the DOWN position
- Put the heddle into the neutral position. Flip the pick-up stick on its side to create a new shed. Weave one pick with the supplementary weft (handspun merino yarn) in the shed created
Repeat steps 1 to 3 three times.
Once this was done, I was ready to start making increases and decreases again. Only this time, I did them in the opposite direction. This creates to movement of the wave.
Final Touches
Wet Finishing
For the wet finishing, I soaked the project into cool soapy water for a few minutes. Then I rinced gently. After that, I put the handwoven piece into a towel and I gently press it in oder to remove the excess water. Then, I let it dry on a flat surface.
Dimensions
I had reserved a bit of warp for testing. Considering only the actual project, I wove for about 70cm.
After that the project was off the loom and wet finished, it measured 54,5cm (22”) long and 42cm (17”) wide. With insight, I should have warped a width that was a little bit larger. This would have helped with the framing of the projet.
Framing
The parts of the project where we only see the silk yarn is actually a little bit see-through. This means that the color of the background of the frame would show! This is why I bought a piece of cardboard that I cut to size. I painted it in a nice teal color that matched the project. The color was just a little bit lighter than the warped which allowed for a nice look of depths without taking the focus away from the wave.
I also decided to staple the handwoven project to the piece of cardboard. This would prevent the cloth from moving around. I know that staples are not pretty, but luckily, the frame had a small rim that hid them all!
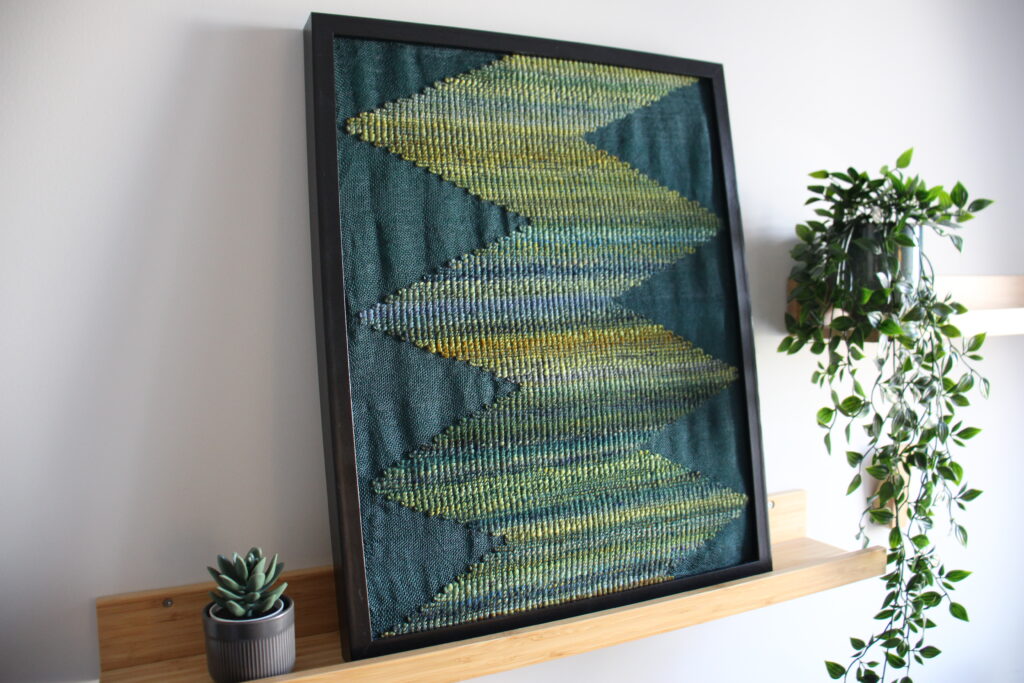
Finally, I made sure to remove the plastic in front of the frame. The idea what that the project would be free. It’s art that people can actually touch!
Thoughts on the Project
I had so much fun making this project and I feel inspired to keep weaving more project with the pick-up stick and supplementary weft technique. The design I decided to create here is one of an infinite number of possibilities. For example, I could have created a totally different shape. Or I could have made two different parallel lines of pattern moving around. You see what I mean with infinite number of possibilities? It’s so much fun to use handspun yarn to create an handwoven art piece!