Planning a Warp Pattern Using a Spreadsheet
A few weeks ago, I took on the challenge of weaving one scarf in only one day. The focus of my video was to show how fast weaving a scarf could be on a rigid heddle loom. However, I did not cover the pattern of the scarf that I was making and this is why I’m making this tutorial today. I thought it was a good opportunity to explain more in depth how I’m planning my warp pattern using a spreadsheet.
Disclaimer: Links included on this page might be affiliate links. This means that if you purchase a product or service with the links that I provide, I may receive a commission. Please note that there is no additional charge to you. This helps me keep going and create more tutorials.
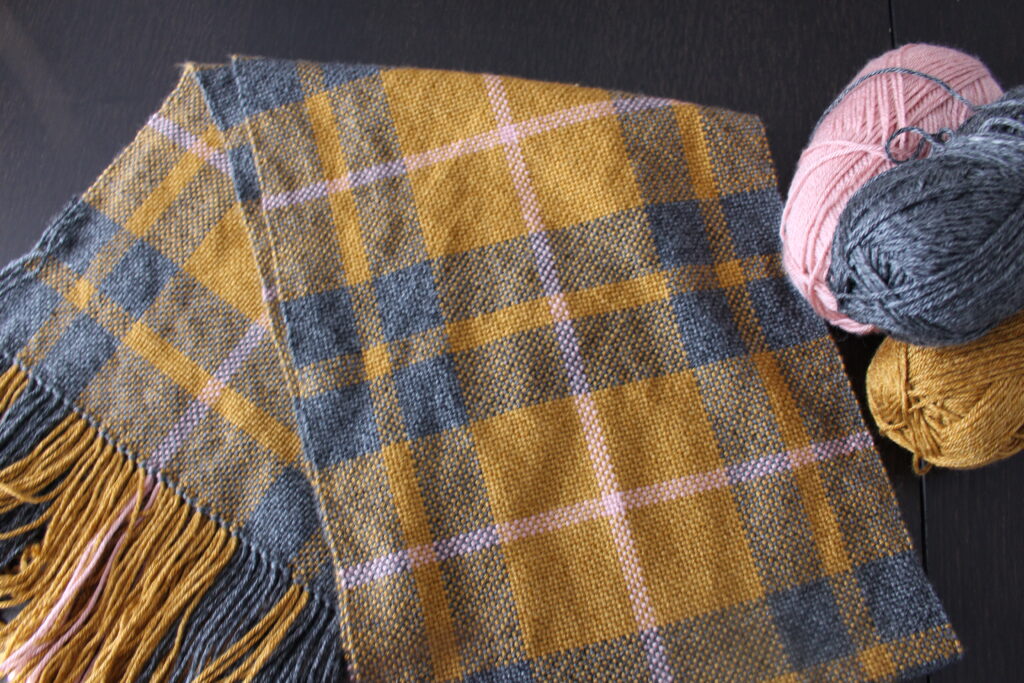
The Yarn
For this project, I used Lion Brand yarns from their Heartland collection. The first color is grey and the actual name is “Great Smoky Mountains”. I also used golden yellow which official name is “Canyonlands”. And the last one but no the least is the pink or as they call it “Capitol Reef”. I love those colors; they are so rich and shiny. I also love their texture! Very soft and perfect for a scarf.
In total, I used one whole ball of grey and a little bit of a second ball. I also used one whole ball of golden yellow and a little bit of a second ball. I used just a little bit of the pick yarn, so one ball was enough.
You can get the same yarn here : https://lionbrand.sjv.io/QjrVWz
Why Using a Spreadsheet?
There exists weaving software that can also help you plan a pattern. However, most of them cost money and I find that they are not all so user friendly. As a beginner, sometimes it is best to use a tool that you already know and for me, it’s a spreadsheet.
In this tutorial, I’m using Excel Spreadsheet, mostly because I already had it on my computer. Please note that if you do not have Excel, you could use Google Sheets, which is a free service.
The Limitations of a Spreadsheet
As excel is not a weaving software, it does have some limitations. Indeed, we cannot plan the warp and the weft at the same time. This is because Excel, or any other spreadsheet, is not designed to take into account the interlacement of the warp and weft threads. If we were to try to change the colors of the rows, we would also be changing the colors of the columns. Still, using a spreadsheet allows me to test out different color combinations. It also gives me a visual of the proportion that each stripe will have. I find that it works great for simple rigid heddle loom weaving projects and this is why I’m planning my warp pattern using a spreadsheet.
Preparing the Spreadsheet
First of all, I needed to prepare the spreadsheet. I wanted to determine how many ends my project will have. For this project, I decided to weave a width of 16” with my 7.5 DPI heddle. This means that I would have 120 ends. I then numbered 120 columns in my spreadsheet. After that, I adjusted the size of those columns to have a width of “3”. This makes them look squarer and more like the threads. After this step, I still couldn’t see all the columns in my screen so I had to zoom out. If this had not been enough, I could have also divided the thread count by 2. Then each column would have represented one loop, so two threads.
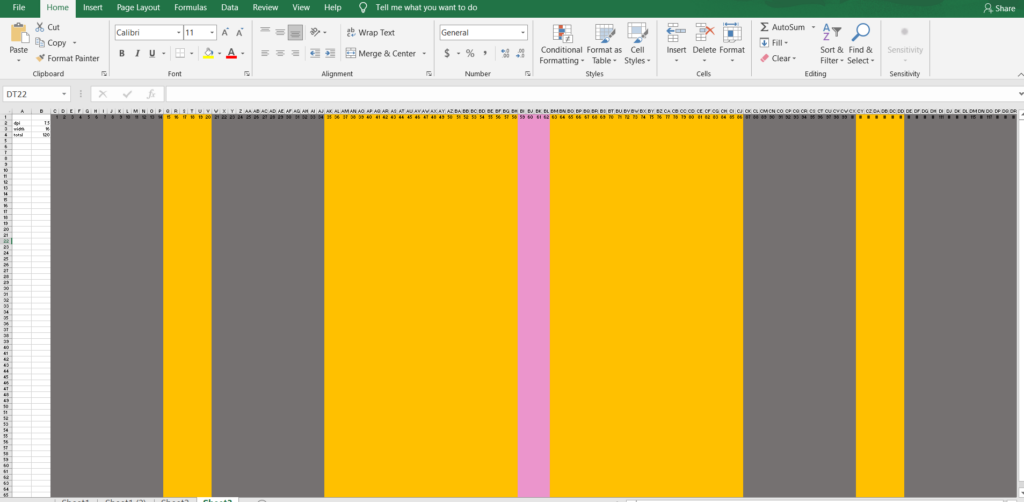
After that, the fun began! This is when I played around a lot with colors and I tried different things. When planning a symmetrical project like this one, I like to start from the middle and make my way to the edges.
The Pattern
Here’s the exact threads count for this project, from right to left (or even left to right as this project is symmetrical).
14 grey, 6 yellow, 14 grey, 24 yellow, 4 pink, 24 yellow, 14 grey, 6 yellow, 14 grey.
For the weft, I like to plan as I go. For this scarf, I did a replica of the pattern of the warp. As this was a balanced weave, I could weave the same number of threads in the weft as there were in the warp. Although for this project I also measured the stipes:
2 inches of grey (14 threads)
1 inch of yellow (6 threads)
2 inches of grey (14 threads)
3 inches of yellow (24 threads)
Half inch of pink (4 threads)
3 inches of yellow (24 threads)
And I repeated this sequence all the way through. I also made sure that the beginning of the scarf and the end would be the same. To do so, I had to make sure to finish weaving with grey. I simply had to know when to stop weaving which was at 1m83 (73”). There was still a little more warp that could be woven but I had to stop to keep the integrity of the pattern.
The Loom
I decided to weave this project using my Ashford rigid heddle loom that is 32” (80cm) wide. If you are looking for the same loom and are in the US, The Woolery has it! Here’s their website: https://woolery.com/products/ashford-rigid-heddle-loom?aff=214 For Canada, it’s available at Tisse et File. Here’s the link: https://www.tisseetfile.com/en/products/metier-a-tisser-rigid-hedge-rh-ashford?ref=MYLENALAROCHELLE&variant=29198243004521
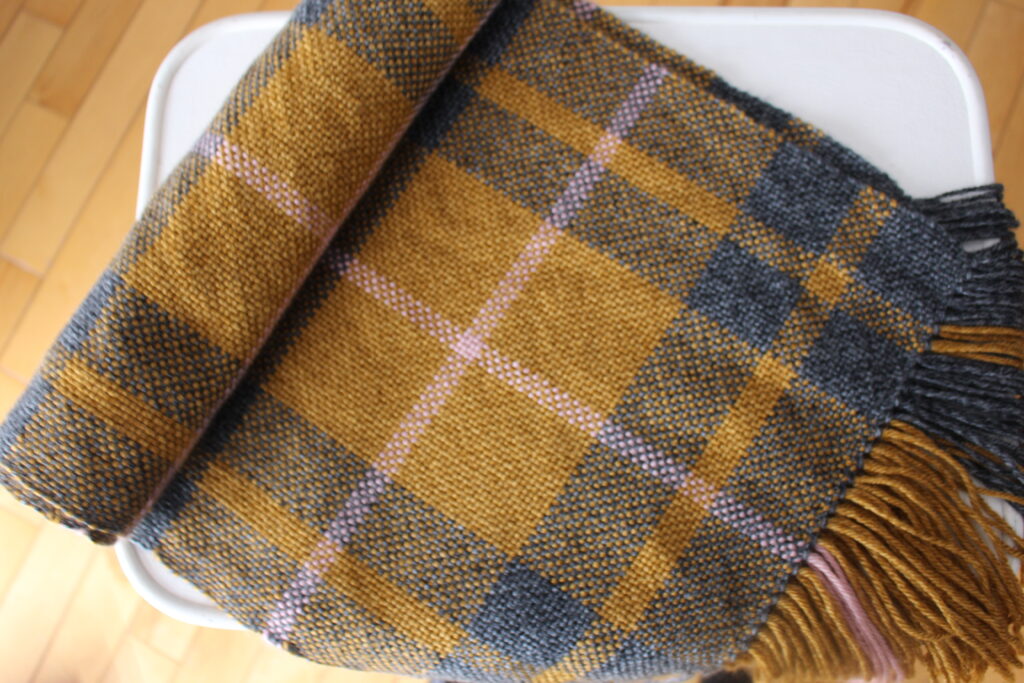
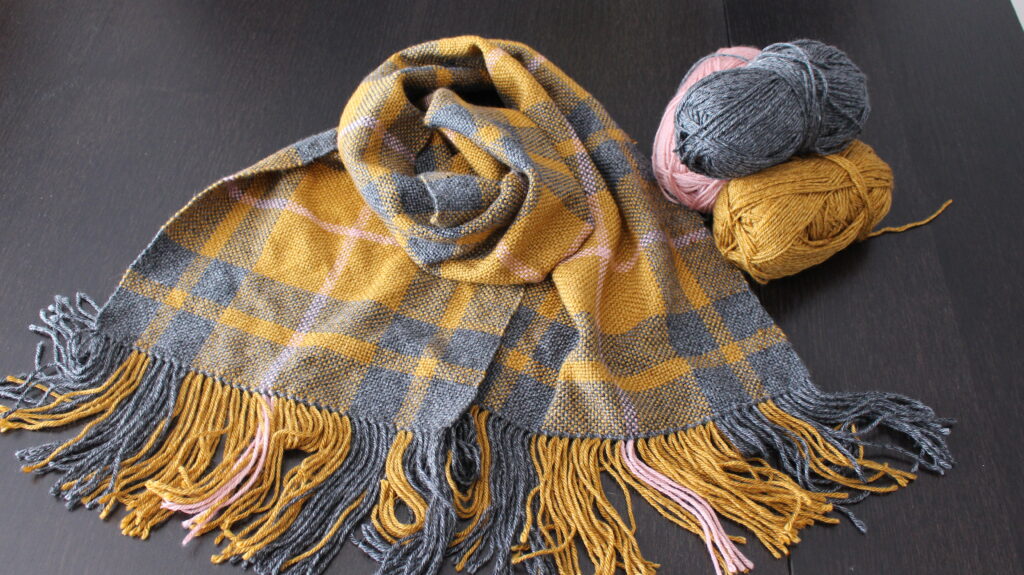
The Final Scarf
I hemstitched both ends. Here are the final dimensions of this scarf. I warped a length of 2.5m (100”) and a width of 16”. I wove for about 1m83 (73”). After wet finish, the scarf was 1m76 long and 36 cm (14.5”) wide. On top of that, I left fringes of 15 cm (6”) on each end.
I think the 1/2 pink comes between the two 3 yellow in the weft pattern listed above.
This is great. Thanks for being so clear.
You are so right! Thanks for noticing and letting me know. It’s now corrected!
Muuuuchas gracias por compartir.
Saludos desde CHILE, South América.
De nada! Gracias por su comentario 🙂
Thanks for the video!
To expand on the idea of the spreadsheet, with very little extra effort you actually can do the warp and weft in Excel (Open Office/Google Docs). This is however, only for people who already reasonably comfortable using spreadsheet software.
———————————————-
The trick is to combine Conditional Formatting together with an if() formula.
———————————————-
a) I use conditional formatting to assign colors to numbers (1=red; 2=blue, etc….)
b) Along the sides of the warp/weft (columns and rows) I add a number corresponding to the specific color of that warp/weft
d) Again, along the sides of the warp/weft (columns and rows) I add another column and row with simple alternating 0’s and 1’s. This simulates a basic weaving pattern.
e) Then in the actual pattern I use a formula similar to =+if($D20=L$2;L$1;$E20)
Teh $D20 refers to the 1/0 in the 20th Weft
The L$2 refers to the 1/0 in the “L” column warp
The L$1 refers to the color of the “L” column warp
The $E20 refers to the with color of the 20th Weft
By changing the colors of in the warp/weft columns I can quickly simulate various patterns.
Once it is ‘programmed’ you really don’t have to change except the colors to test new patterns.
Hope this helps at least one other person…. 😉
Thank you so much for this information. I find it really interesting. I will definitely try it 🙂
If you can get your head around the formula maybe you could do a video on it😁 great pattern. I have just ordered a rigid heddle and the yarn to make this scarf xxx
For sure 🙂 Thank you! I wish you lot’s of fun weaving it!
I am a new rigid heddle weaver wanting to try a pattern and you have made it so easy for me! Thank you a million times for being so clear on all the measurements of each color. I can hardly wait to get started!❤️🧶
You are welcome! I’m so glad I could help 🙂
How many meters/yards of each color did you use?
Each ball contains 230m/251 yards. For the grey and yellow, I used one whole ball and a little bit of a second ball. I would estimate that I used about 240m of grey and yellow. Then for the pink, I did not use a lot of it. I would estimate about 20m.
Hi Mylena you are always nice and professional. I’m doing the same project using a mix wool and cachemire to create your scarf for a dear friend.
Have fun with your looms! Vale from Italy
Thank you so much! 🙂 That’s awesome! It will surely turn out beautifully. Best wishes from Canada!
Thanks love it
Where I can find the weaving machine
I want to learn
Asra
Weaving looms are available online on different sites. If you look at the manufacturer website, they often disclose a list of their distributors. Good luck in finding you loom!
That is so helpful for planning my very first rigid heddle project. Thanks for sharing your method for design possibilities. I’ve been learning so far tapestry weaving using pattern which I’m drawn to. I have already found this a challenge in terms of visualising the finished pattern despite sketches so was feeling even more daunted about starting rigid heddle weaving! Weaving definitely reaches parts of my brain not used before 😄
Hi Mylena!
(I hope that I am spelling your name correctly. Please tell me if not.)
You are BRILLIANT!
I bought my wife an Ashford 16″ loom and she wants to do your Rustic Christmas Dishtowels for her first project.
Since her loom is only 16″, we had to adjust the warp and weft. But your instructions made that EASY!
Everything you do is so perfect! And your cheerfulness makes me always want to seek out your videos first.
Thank you! Thank you! Thank you!
Hi Mylena,
Thank you for the beautiful scarf pattern. I’m surprised that the yarns you choose for this project are actually knitting yarns. Until know I always thought, that only yarns, that are explicitly marked for weaving can be used, especially for the weft. Which limited my possibilities of course. How do you decide, if a yarn is suitable for weaving? Thank you very much in advance!
Best regards from Germany,
Sandra