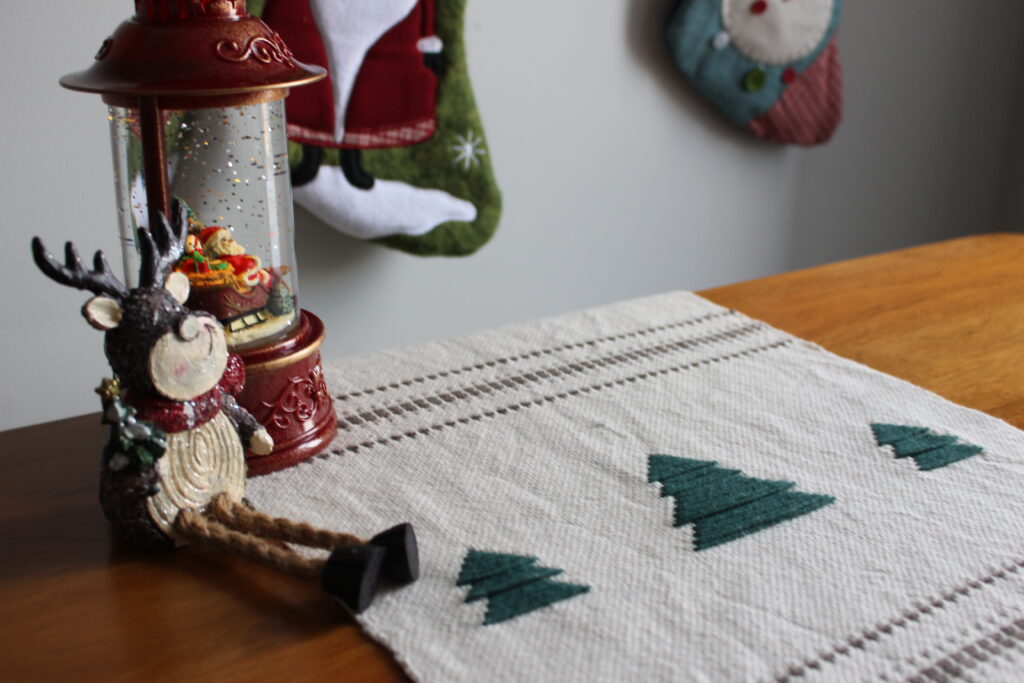
Weaving a Christmas Table Runner
The holidays are less than one month away and I couldn’t be more excited. In my excitement, I got inspired to weave a table runner that would be inspired by Christmas. On this page, I’m sharing the details about the weaving of this project. This page will be under development for a few weeks. I will be releasing three different videos about the project and every time that I will release a new video, I will add info to this page.
Stay tune to see all the details!
For disclaimer, links included on this page might be affiliate links. This means that if you purchase a product or service with the links that I provide, I may receive a small commission. Please note that there is no additional charge to you. This is just a way for me to keep making this content. Thank you for your support!
The Yarn
For the warp of this project, I used 8/2 cotton from Maurice Brassard in the color “Naturel” (LEC-Y100). I have also used this same yarn for the weft. I used almost one whole spool to make this project. If you are in the US, this yarn can be found on the Woolery’s website, Here’s the link: https://woolery.com/maurice-brassard-cotton-yarn-8-2.html?aff=214
For Canada, it’s available at Tisse et File. Here’s the link: https://www.tisseetfile.com/en/collections/coton/products/coton-fil-tissage-2-8?ref=MYLENALAROCHELLE
In the pattern, I have also used 8/4 Rainbow Cotton from Hobbii. I decided to chose one ball of their Grey Brown (005) for my pickup stick pattern. Here’s the link where you can get the same yarn: http://bit.ly/4nhoNgU
For the Christmas trees, I used the same yarn, but in the Deep Jungle Green (100) color. Here’s a link where you can get the same yarn: http://bit.ly/45Y8Syw
Those yarns were used only a few times on the project and I still have plenty left on my balls.
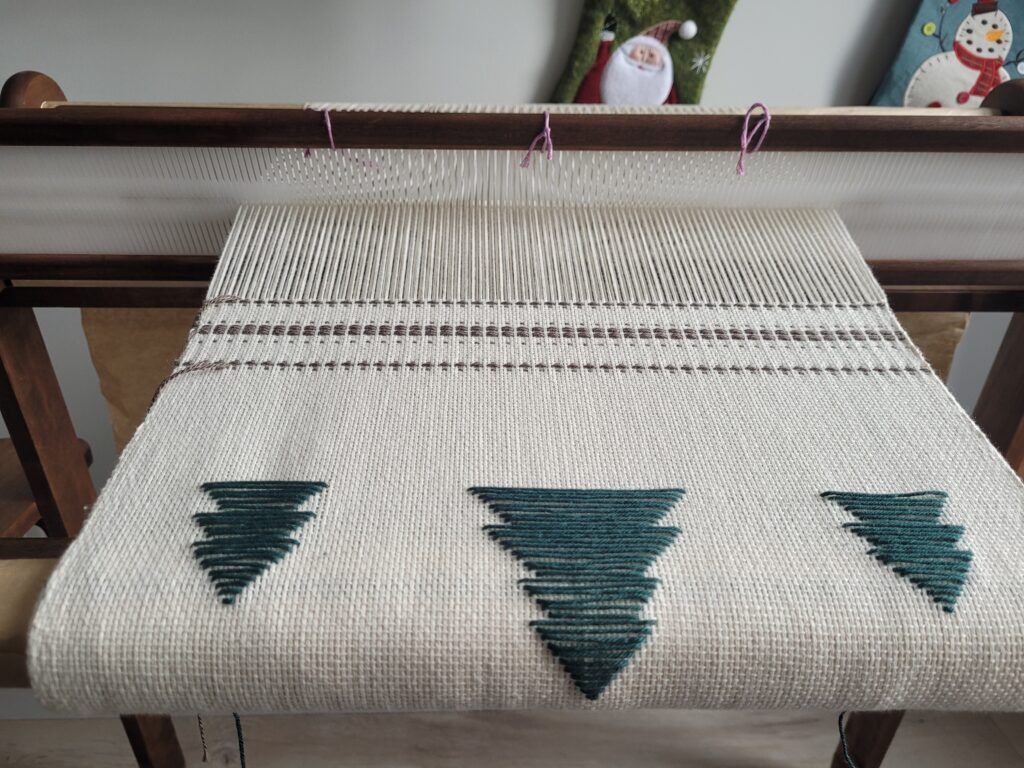
The Loom
To weave this project, I used my 32” (80cm) rigid heddle loom from Ashford. However, any loom that is at least 15” wide would be suitable for this project. If you are looking for a loom just like mine and are in the US, you can check out the Woolery’s website here: https://woolery.com/ashford-rigid-heddle-loom.html?aff=214
For Canada, it’s available at Tisse et File. Here’s the link: https://www.tisseetfile.com/en/products/metier-a-tisser-rigid-hedge-rh-ashford?ref=MYLENALAROCHELLE&variant=29198243004521
The Equipement
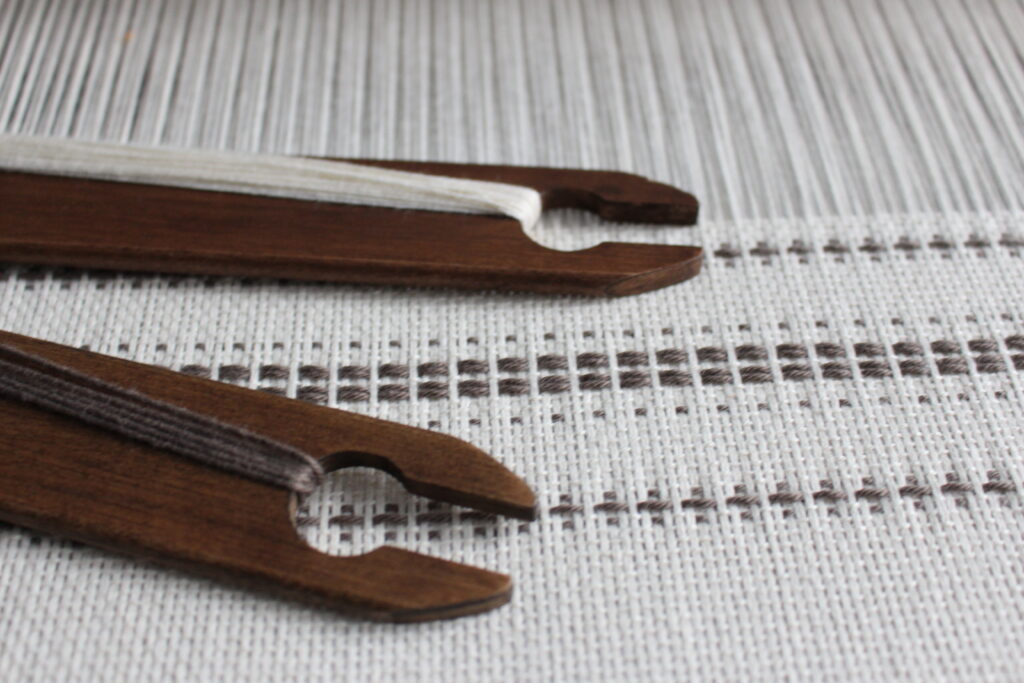
In order to weave this Christmas Table Runner, you would need a pickup stick that is a bit longer than 15” as well as 2 shuttles. Also, I used my 12.5 DPI heddle.
If you are looking to buy extra heddles or pickup sticks and are in the US, the Woolery has them all! You can access their shop through this link: https://woolery.com/weaving/reeds-heddles-raddles/rigid-heddles.html?aff=214
For Canada, it’s available at Tisse et File. Here’s the link: https://www.tisseetfile.com/en/products/peignes-en-nylon-pour-metier-a-tisser-ashford-rigid-heddle?ref=MYLENALAROCHELLE
The Warp
I warped a width of about 15” (38cm) wide and I doubled the yarn in my heddle. In total, I warped in 192 dents. This means that I had 384 ends since that I doubled my warp in my heddle. This also means that my warp was about 4 dent wider than 15”. If your loom is exactly 15” wide, then it might necessary to warp just a few less threads than what I did.
I also warped for a length of 102” (2.6m).
The Weft
For most of the weaving of this table runner, I wove normal plain weave with the same 8/2 cotton that I used in the warp. However, I did not double it in the weft.
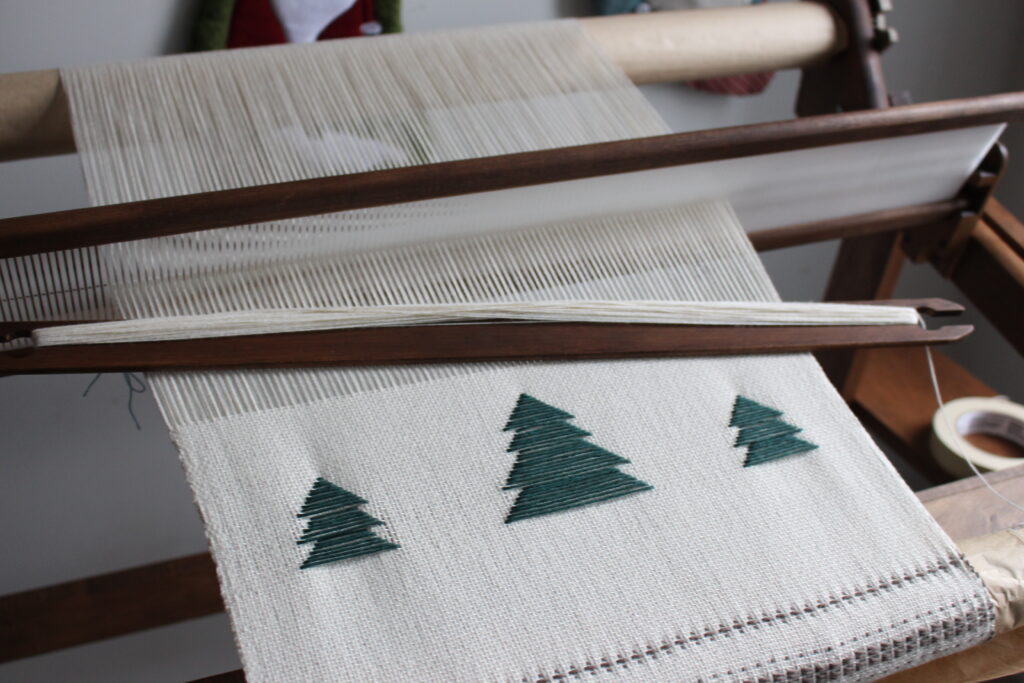
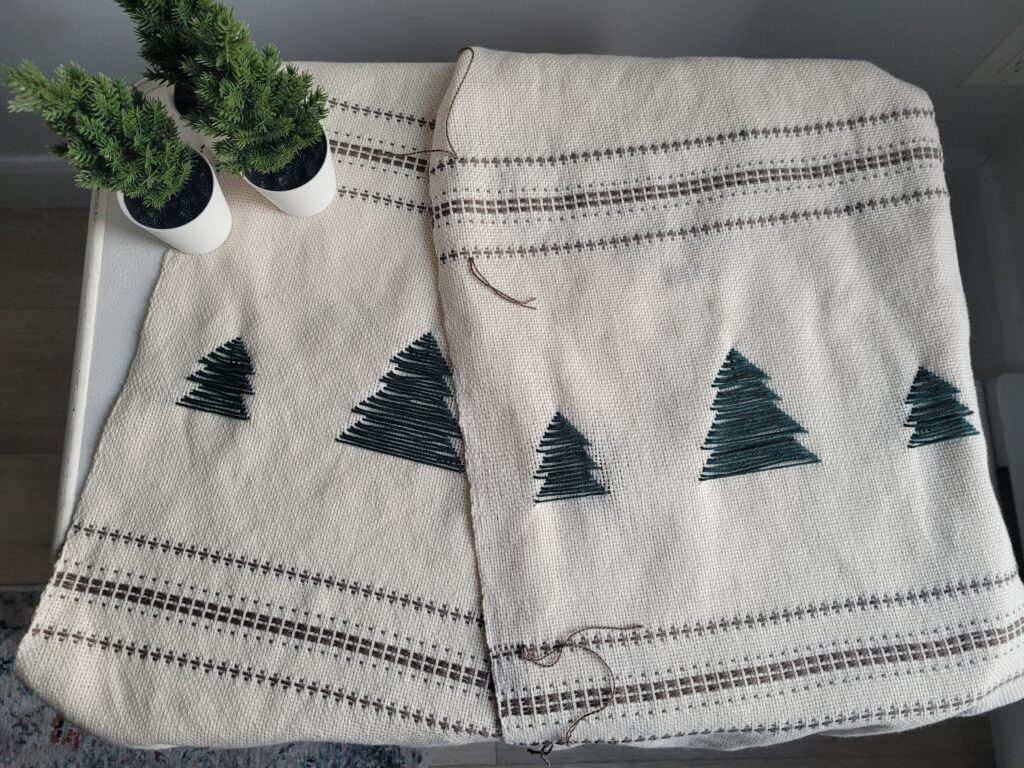
The Pattern
The pattern for this project can be divided into thre parts: the pickup stick sequence, the Christmas trees and some plain weave. The pattern is repeated twice, once at each end of the table runner. Here’s the outline of the weaving of this Christmas table runner:
-4” (10cm) of plain weave with the natural 8/2 cotton
-Pickup stick pattern
-3” (7.6cm) of plain weave with the natural 8/2 cotton
-Christmas trees pattern (Right Side Up)
-3” (7.6cm) of plain weave with the natural 8/2 cotton
-Pickup stick pattern
-40” of plain weave with the natural 8/2 cotton
-Pickup stick pattern
-3” (7.6cm) of plain weave with the natural 8/2 cotton
-The Christmas Trees pattern (Upside Down)
-3” (7.6cm) of plain weave with the natural 8/2 cotton
-Pickup stick pattern
-4” (10cm) of plain weave with the natural 8/2 cotton
In total, this should take about 78” (1m98) to weave this whole Christmas table runner.
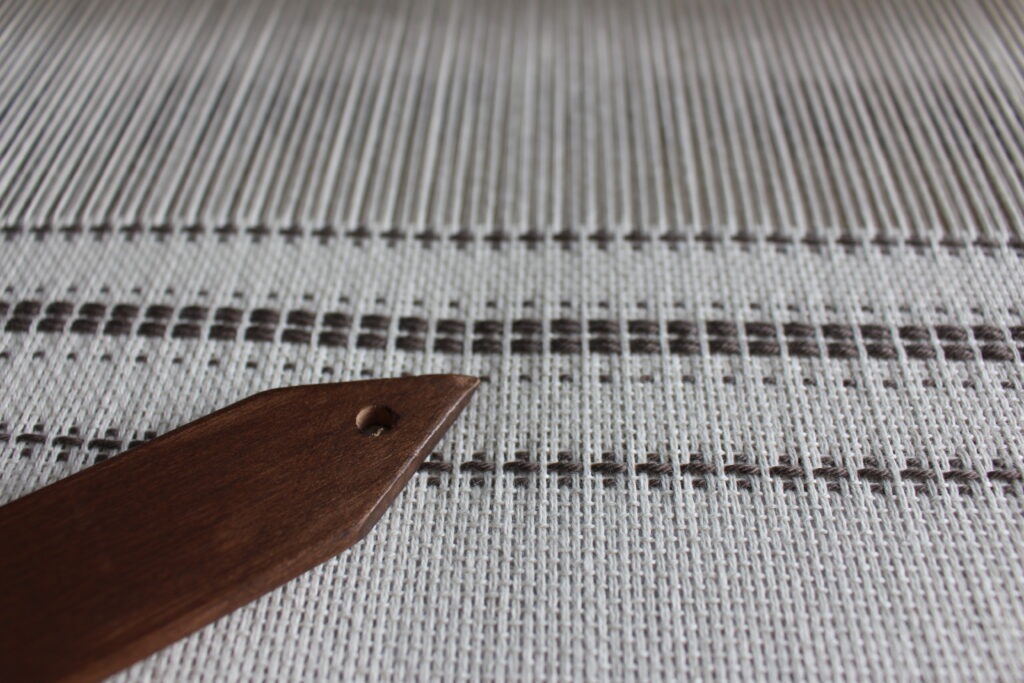
The Pick up Stick Pattern
Here’s the video about the weaving of the pickup stick pattern. I recommend watching it to get a detailed explanation of the pattern.
Preparation of the Loom
First of all, let’s talk about how to set the loom for the pickup stick pattern. To begin, I put my heddle into the down position. Pickup sticks usually work with the slot threads and this makes it easier to pick them since that they are now on the top of the shed. Then, using the pickup stick, I did a “pick one, skip one” sequence and I repeated that all the way through my project.
To avoid any confusion, I’d like to add some clarification. In the beginning of the project, I doubled my warp in my heddle. This means that there are two threads in each slot and in each hole of the heddle. When I say that I’m picking or skipping “one”, I’m talking in terms of set of double threads that can be found in each slot. In other words, I picked two threads that were in the same slot, then skipped two threads that were in the following slot, and so on. Basically, once I doubled my threads in my heddle, I started to see the couple of threads as a whole and I’m dealing with them together.
Some Tips!
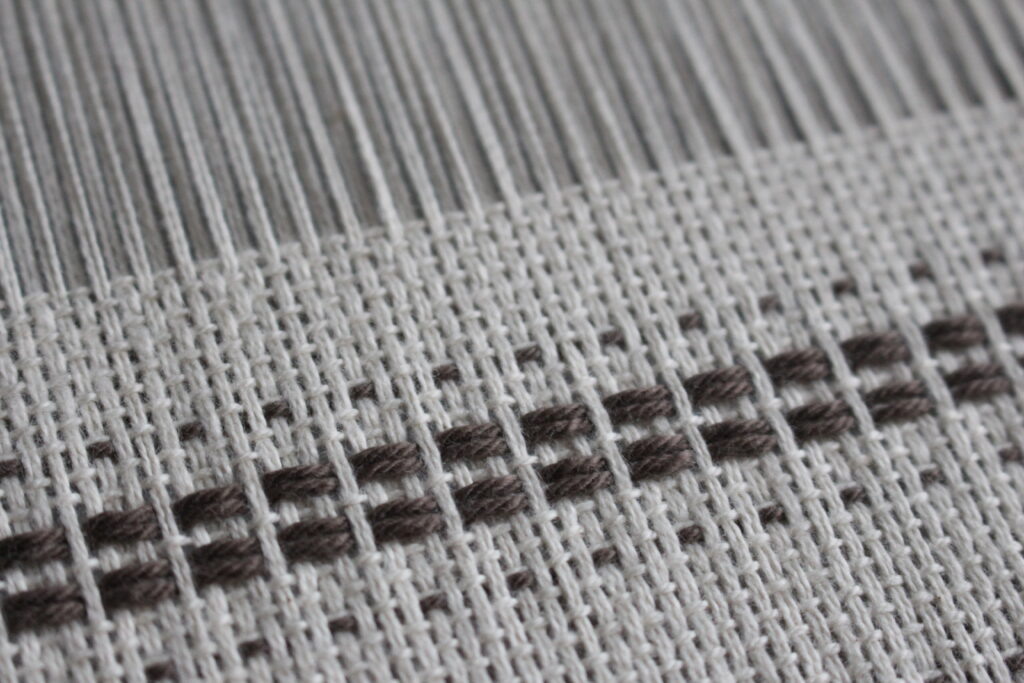
Here’s a few guidelines to help you with this pickup stick pattern. First, every pick woven with the help of the pickup stick will be done with the brown supplementary weft yarn (8/4 cotton). Then, in between each picks woven using the pickup stick, I will weave at least one normal pick using my normal weft yarn (8/2 natural cotton).
Before starting the pattern, it’s important to weave one pick in the down position. The pattern needs to start in the up position and the first normal pick of the sequence needs to be woven in this shed. Otherwise, it will not look the same. In order to keep the pattern light, I have simplified some indications. When I write “up”, “down” and “neutral”, I’m referring to the position of the heddle. When it’s needed to weave with the supplementary brown yarn, I will mention it. Otherwise, all the picks are woven with the primary weft yarn. For example, if it’s only written “up”, this means that this a normal pick woven with the 8/2 natural cotton.
Here’s the pattern:
The First Part:
-Up and pickup stick with the supplementary weft (brown yarn)
-Up
-Neutral and pickup stick with the supplementary weft (brown yarn)
-Down
-Up and pickup stick with the supplementary weft (brown yarn)
-8 normal picks with primary weft (make sure that the 8th pick is woven into the down position)
The Second Part:
-Up and pickup stick with the supplementary weft (brown yarn)
-Up
-Down
-Up
-Neutral and pickup stick with the supplementary weft (brown yarn)
-Down
-Neutral and pickup stick with the supplementary weft (brown yarn)
-Up
-Neutral and pickup stick with the supplementary weft (brown yarn)
-Down
-Neutral and pickup stick with the supplementary weft (brown yarn)
-Up
-Down
-Up and pickup stick with the supplementary weft (brown yarn)
-8 normal picks (making sure that the 8th pick is woven into the down position)
The Third Part:
This section is woven exactly like the first one. Here’s the details:
-Up and pickup stick woven with the supplementary weft (brown yarn)
-Up
-Neutral and pickup stick woven with the supplementary weft (brown yarn)
-Down
-Up and pickup stick woven with the supplementary weft (brown yarn)
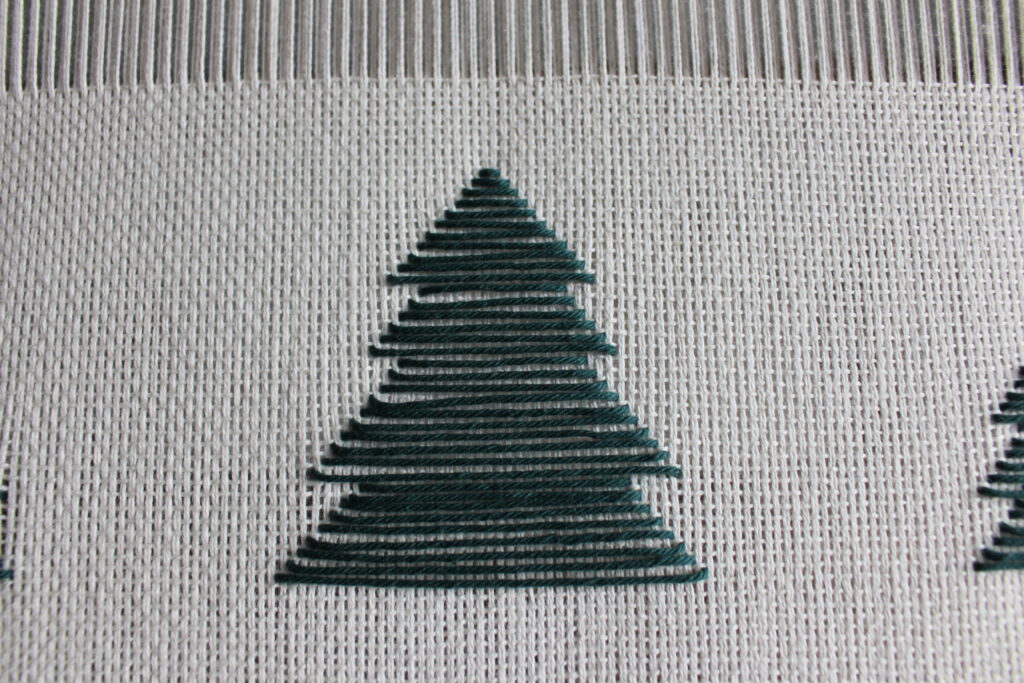
The Christmas Trees (Right Side Up)
Here’s the video about the making of the Christmas trees. I find that the video explains well the technique to make them. Here, I will mainly focus on the pattern itself.
The hardest part of this pattern is just to start and set the base of the trees at the right place. As I have mentioned before, I have double my warp in my heddle. However, to keep things simple, I consider that the double threads make a whole and that they are just 1 thread. This means that I have 192 set of threads on my warp.
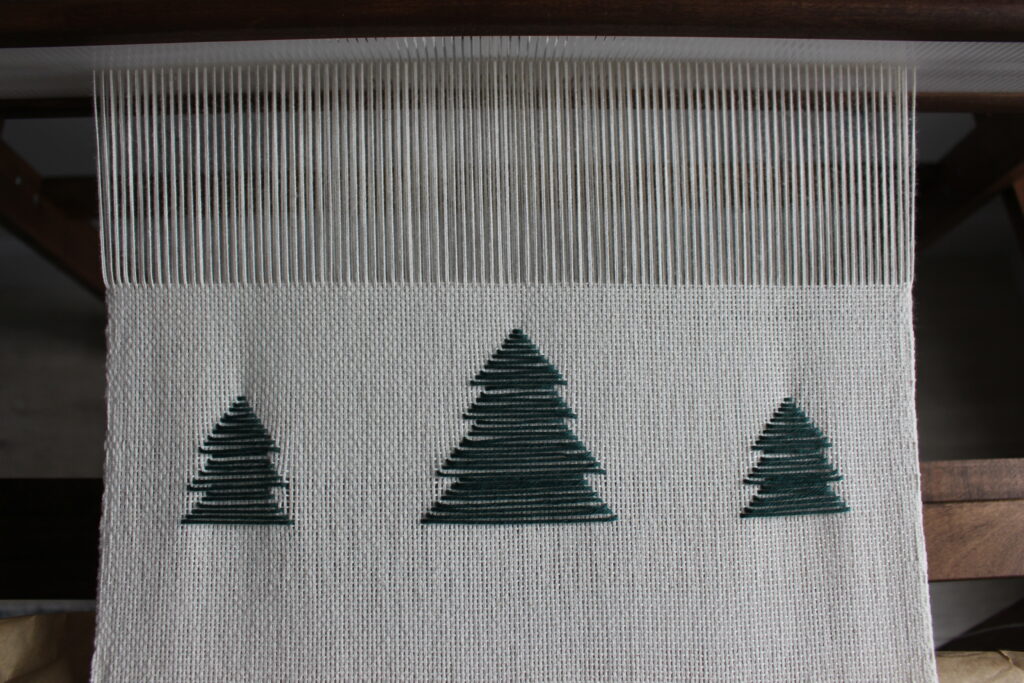
Here’s how I have set the base of the trees, from left to right.
-21 ends
-Base of 1st small tree over 26 ends
-28 ends
-Base of the big tree over 43 ends
-28 ends
-Base of 2nd small tree over 26 ends
-20 ends
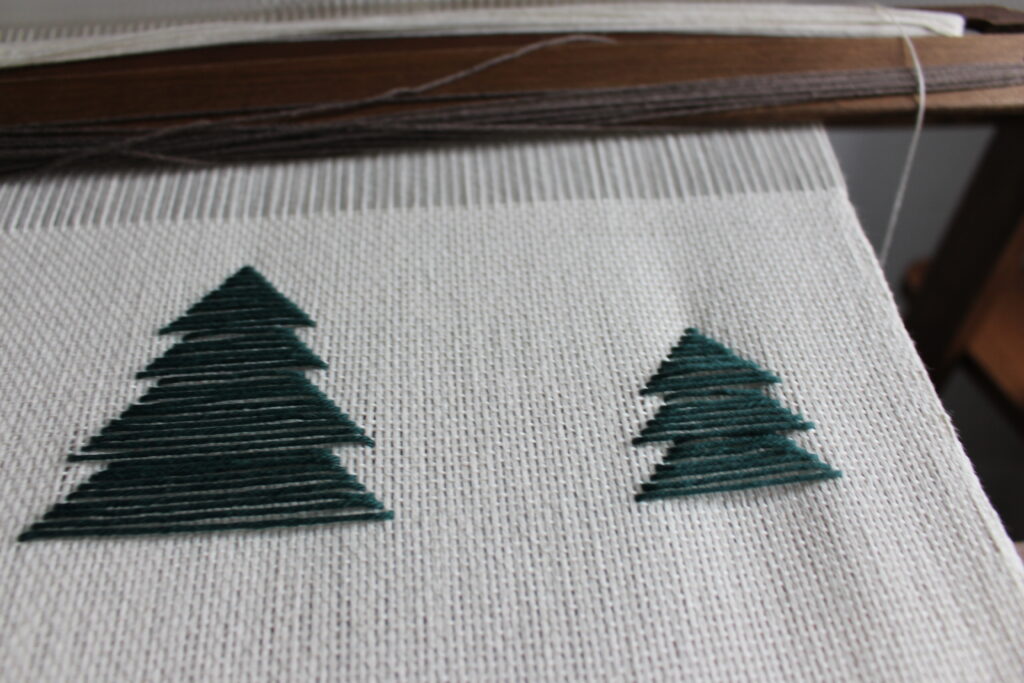
The Small Trees (right side up)
In order to keep the pattern light, consider that every time that I mention a number of rows, it means that the rows are made while decreasing of 1 warp thread on each side. In other words, for each normal rows, I decrease the row by 1 warp thread to the left and 1 warp thread to the right. Otherwise, it will be clearly stated when to do increases. Also, in between each row, I weave one normal pick of plain weave with my normal 8/2 cotton weft. The rows of the trees are always made with the green supplementary 8/4 cotton yarn.
-7 rows
-Increase by 5 warp threads on both side (a total increase of 10 warp threads)
-6 rows (including the increase row)
-Increase by 3 warp threads on both side (a total increase of 6 warp threads)
-10 rows (including the increase row)
The last row should be made over two warp threads. Label on the heddle where the top of the tree is located. This will be helpful for the rest of the pattern.
The Big Tree (right side up)
This tree is made the same way as the small tress, it’s simply bigger! Here’s the pattern:
-9 rows
-Increase by 5 warp threads on both side (a total increase of 10 warp threads)
-10 rows (including the increase row)
-Increase by 3 warp threads on both side (a total increase of 6 warp threads)
-6 rows (including the increase row)
-Increase by 3 warp threads on both side (a total increase of 6 warp threads)
-11 rows (including the increase row)
The last row should go over 2 warp threads. Here again, I suggest labelling the heddle where the top of the tree ends.
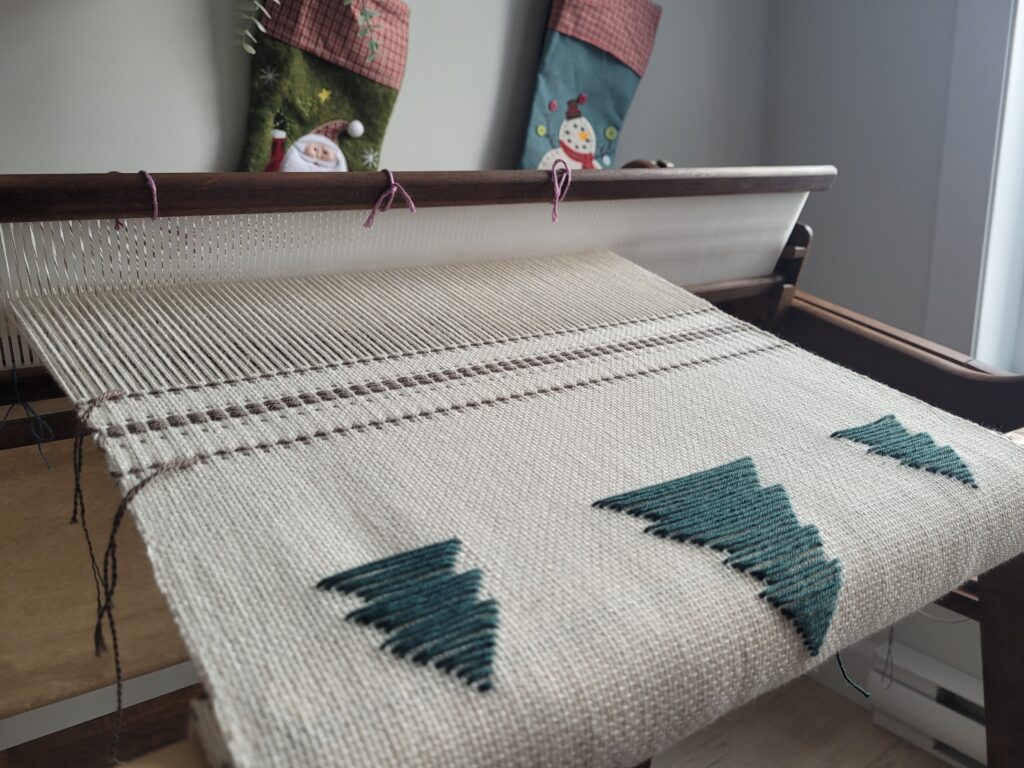
The Christmas Trees (Upside Down)
Since that this project is a table runner, we know that it will lay on a table! And in order for it to look good, it will need to have both set of trees pointing at each other. I already made one set of trees pointing up ward. This means that the second set of trees needs to be pointing down ward. In other words, I need to make them upside down.
Since that the big tree is bigger than the small trees, I will need to start by making this one. After 13 rows, this is when I will be able to start the small trees. If I were to start them at the same time, their base would not be aligned and this might look silly. Also, to start the first tree, I need to locate on the heddle where I have marked the tip of the other big tree. The first row should start there, over two warp threads. Finally, since that the trees are upside down, everything that I will be doing will be in reverse of what I did for the other set of trees. This means that instead of decreasing at every row, here, I will be increasing. I will clearly state when to do the punctual increases.
The Big Tree (upside down)
Here’s the sequence for making the big tree:
-11 rows
-Decreasing of 3 warp threads on each side (for a total decrease of 6 warp threads)
-2 rows
*Start the making of the small trees*
-4 rows
(This section should have in total 6 rows before doing the next decreasing)
-Decreasing of 3 warp threads on each side (for a total decrease of 6 warp threads)
-10 rows
-Decreasing of 5 warp threads on each side (for a total decrease of 10 warp threads)
-9 rows
The final rows should be going of 43 warp threads.
The Small Trees (upside down)
Note that the small trees need be started once you have made 13 rows on the big tree. The first row needs to be over 2 warp threads. Look for the label on the heddle to know which warp thread to use.
-10 rows
-Decreasing of 3 warp threads on each side (for a total decrease of 6 warp threads)
-6 rows
-Decreasing of 5 warp threads on each side (for a total decrease of 10 warp threads)
-7 rows
The last row should go over 26 warp threads.
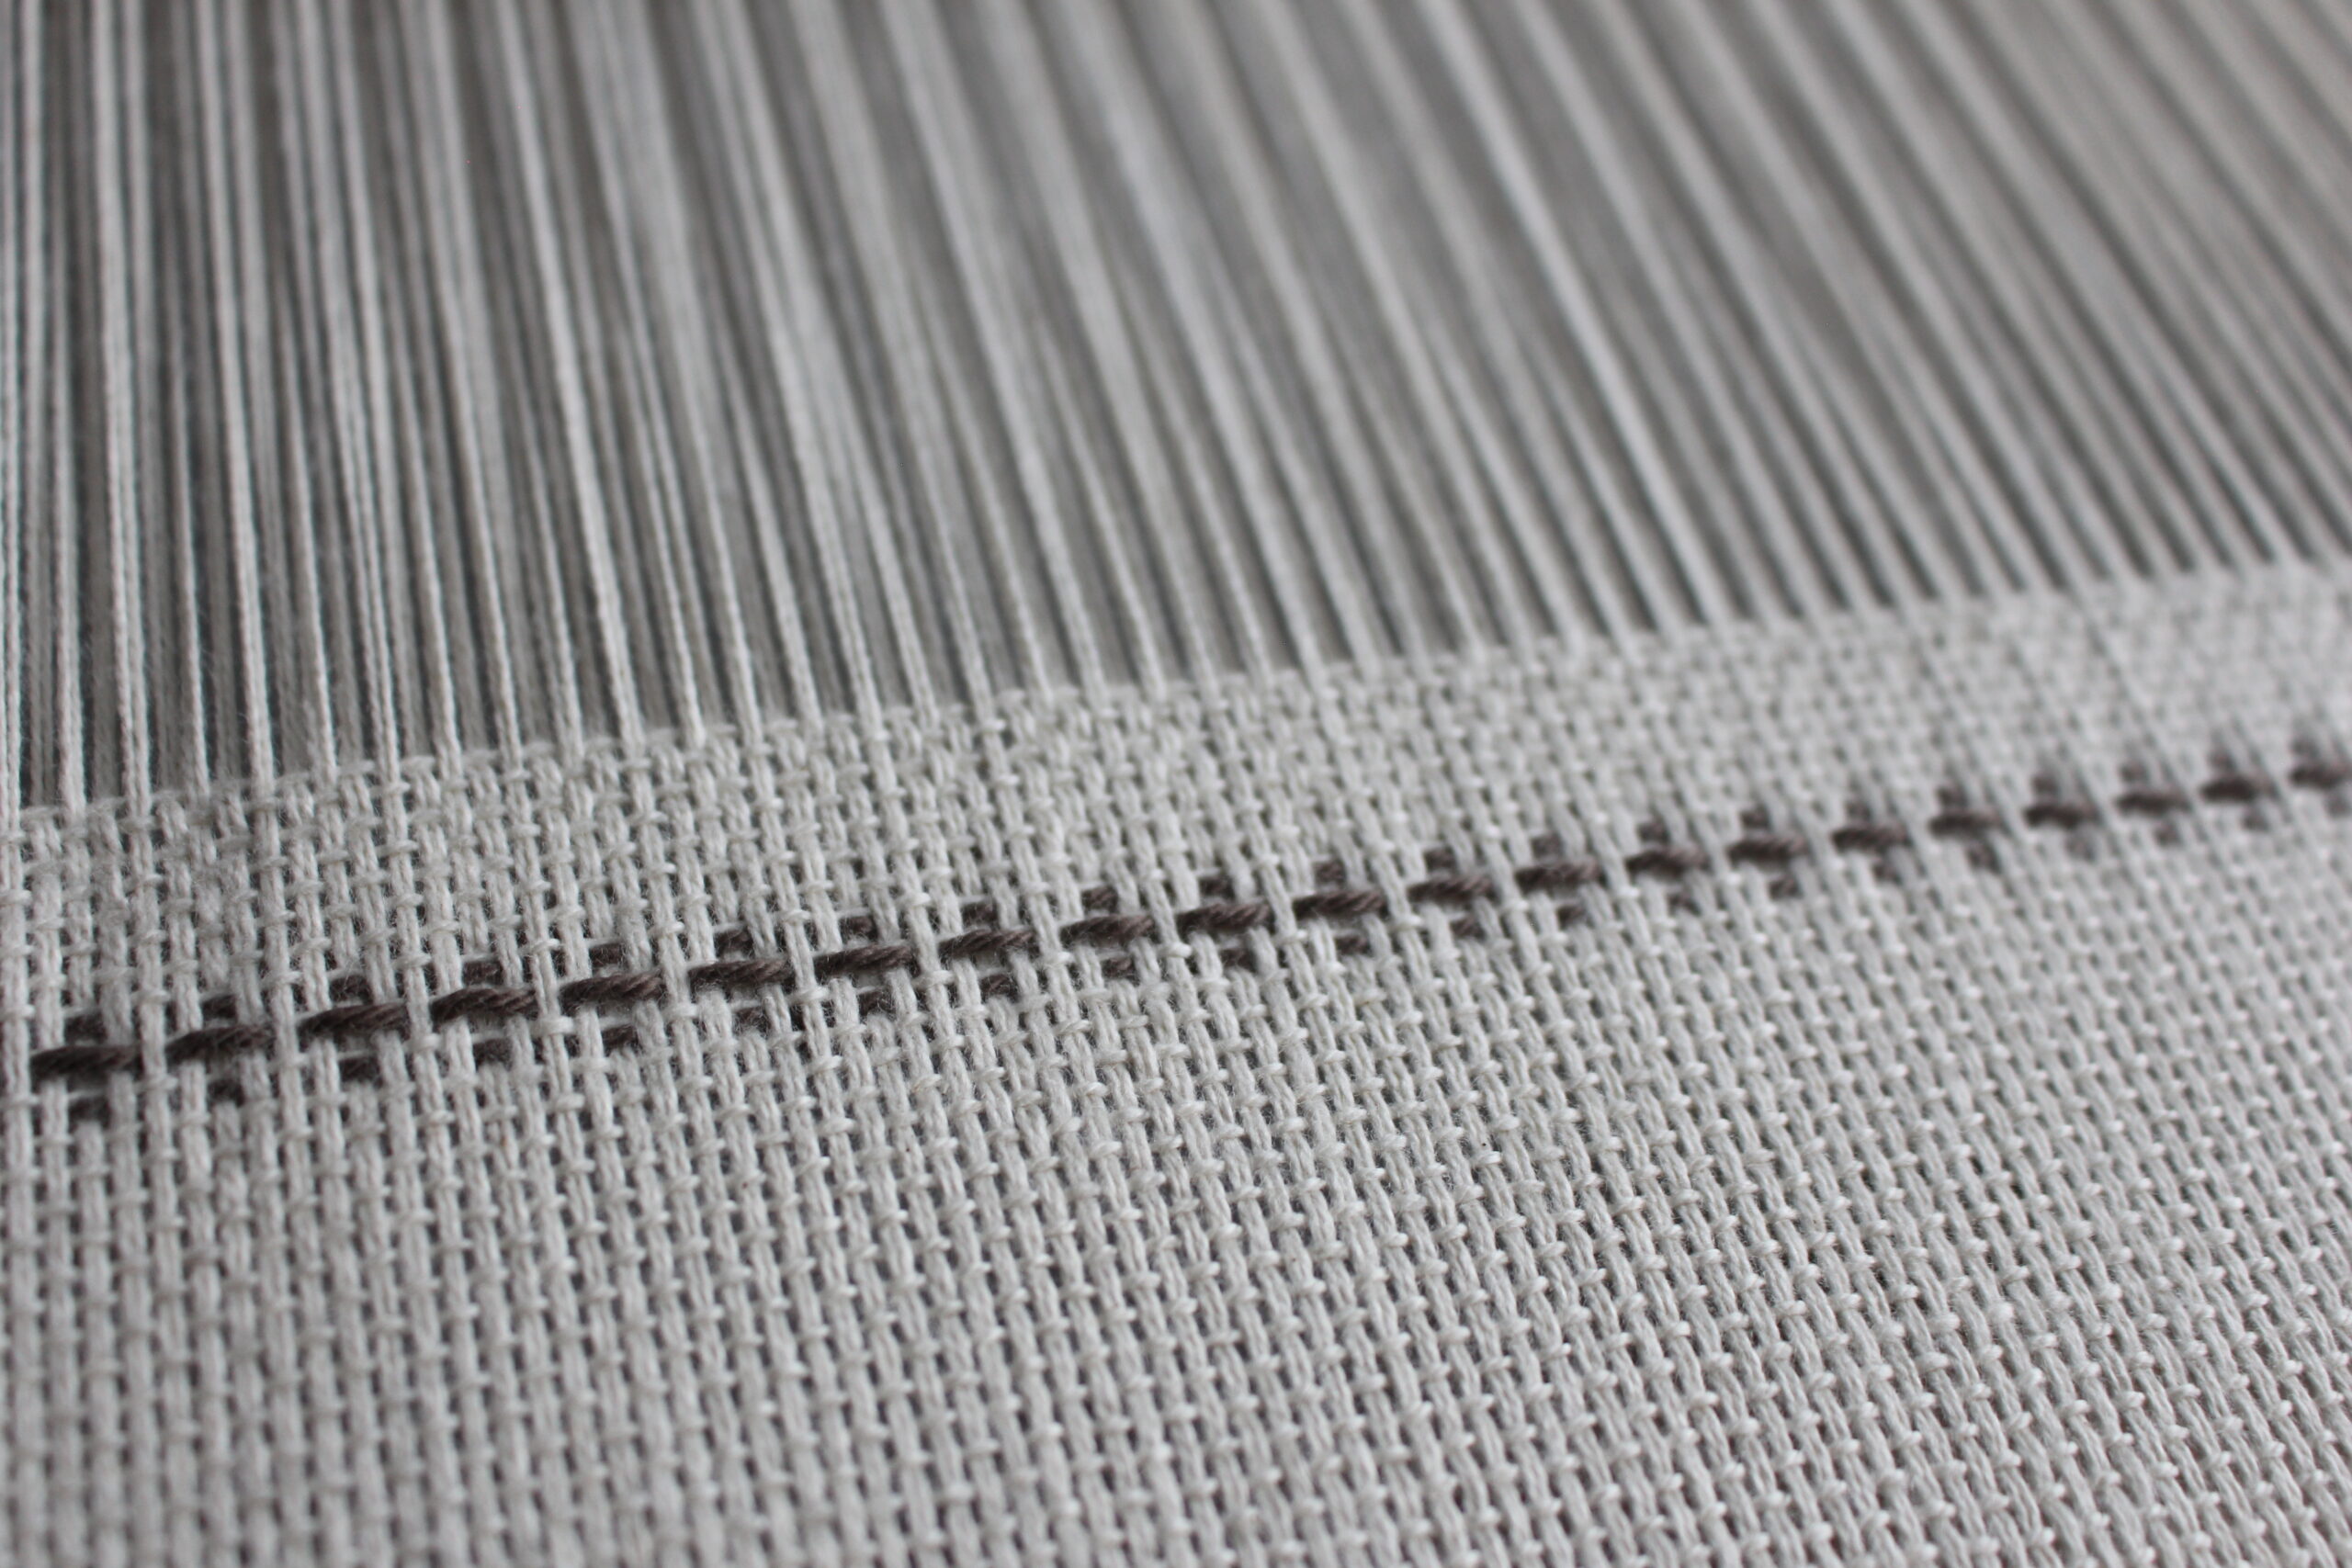
The Final Touches
I decided to hemstitch both ends of the Christmas table runner. For that, I did bundles of 2 weft threads and 6 warp threads (which means the threads that can be found in 3 dents, since that I doubled my warp). I also left fringes of about 6.5” (16.5cm) and I twisted them before wet finishing.
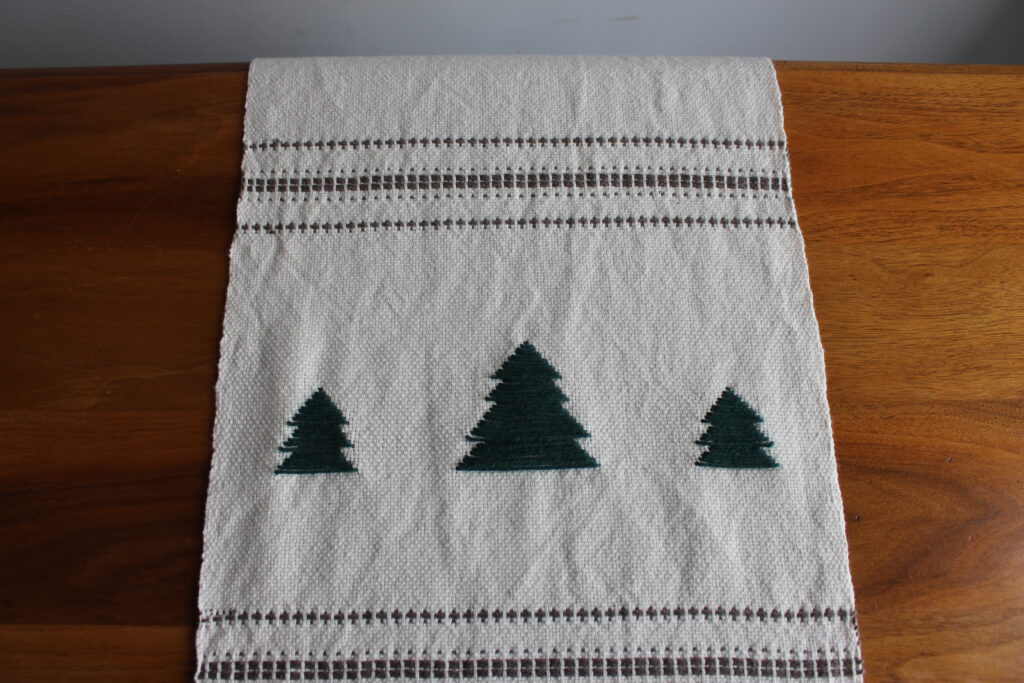
The Final Dimensions
My goal with my project was to end up with a table runner that would be at least 13” (33cm) wide and 70” (1.78m) after wet finishing and without considering the fringes. After wet finishing, the table runner was 67” (1m70) long and just a little short of 13” (33cm) wide. It shrank more than I expected. I still had a bit of length of warp when I cut the project. If I had to redo it, I would weave 43” in the middle part instead of 40” and that should get me closer to my ideal length.
I’m so happy you have a website now! This is an adorable holiday project. I love the pickup pattern and will use it for a dishtowel project. Thank you as always for sharing your enthusiasm with us!
Thank you so much! I’m sure this will make wonderful dishtowels! Happy weaving!
I just found you. I really like your work. I was wondering if you can tell me how or send me in the right direction to do the double warp thread. Do I need to do 4 strings in the slots and then move two to the hole or can I warp the slots and holes separately as I go down the line so to speak? Thank you.
Hello and thank you for your kind words! To answer you, both way works!
Here’s a video where I pulled two loops )so 4 threads) in each slot and then threaded the heddle afterwards (this works best when you have two spools of yarn): https://www.youtube.com/watch?v=WABRIWzd7RQ
Here’s a video where I doubled my warp by putting one loop into the slots and one loop into the holes: https://www.youtube.com/watch?v=RVAxGKJ4PoA
I hope this helps!