Weaving Stunning Curtains for my Studio
Since the day that we have moved into our apartment (over a year ago), we have left the window in my studio empty. I really enjoy all the natural light that is coming through it, especially in the morning. However lately, I’ve been wanting to have a bit more privacy. Maybe it’s just me, but I don’t really want my neighbours to see me weave in my pyjamas on Sunday mornings! This is why I decided to start the weaving of stunning curtains for my studio! This page contains all the information you need to weave the same curtains.
For disclaimer, links included on this page might be affiliate links. This means that if you purchase a product or service with the links that I provide, I may receive a small commission. Please note that there is no additional charge to you. This is just a way for me to keep making this content. Thank you for your support!
The Concept
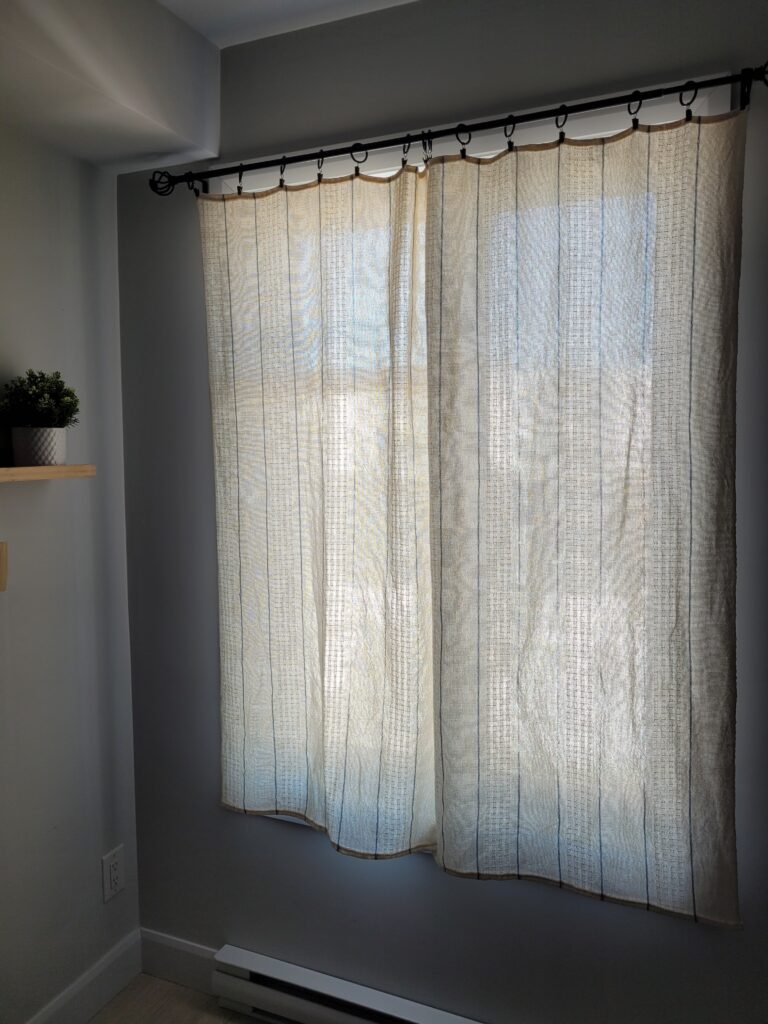
The idea is to have curtains that will be airy enough so that light can still come through. But dense enough so that when guests sleep in that room, they will not be bothered by the sun in the morning.
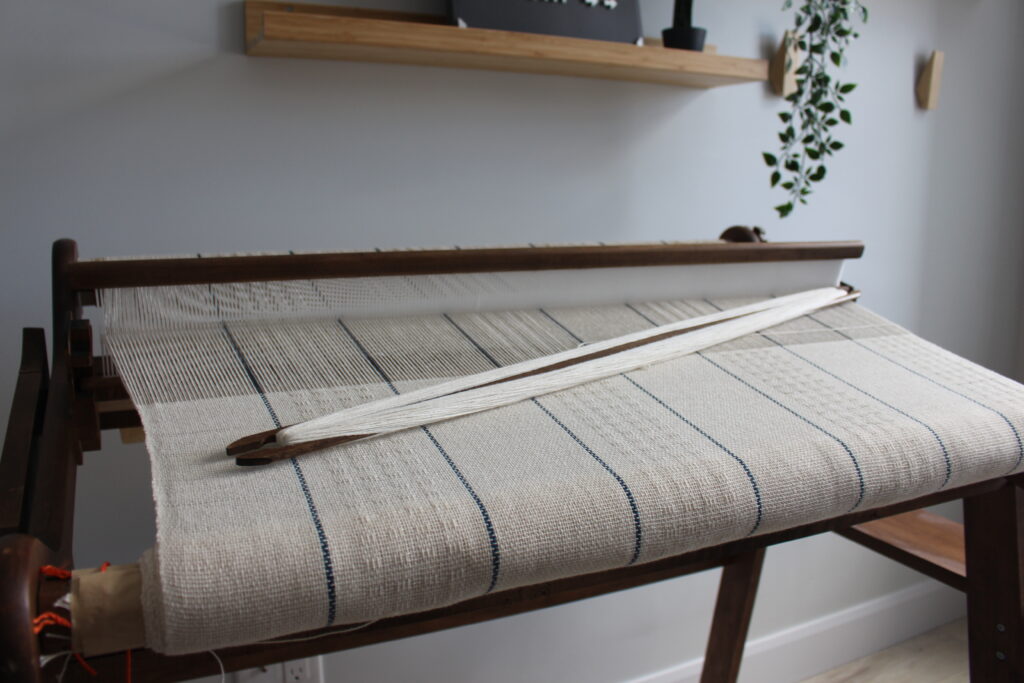
The window is 46” (1m17) wide, considering the glass window itself and the trimming on both sides. In order to cover the whole window, I will then have to weave two panels that will be hung side to side.
The Yarn
I really wanted to make my curtains with a natural fiber! I chose cotton because it’s affordable and I love weaving with it. Specifically, I decided to use 8/2 cotton from Maurice Brassard in the colors “naturel” (natural) and “jeans” (blue). I mostly used the color “naturel” throughout the project: I used it in most of the warp and exclusively in the weft. I estimate that I used about 2 whole cones and a little bit of a third one (about one quarter). Each bobbins contain about 1680 yds of thread in them. Also, I used only a little bit of the 8/2 cotton in the color “Jeans”.
If you are in the US, here’s where you can get the same yarn on The Woolery’s website : https://woolery.com/maurice-brassard-cotton-yarn-8-2.html?aff=214
For Canada, it’s available at Tisse et File. Here’s the link: https://www.tisseetfile.com/en/collections/coton/products/coton-fil-tissage-2-8?ref=MYLENALAROCHELLE
The Tools
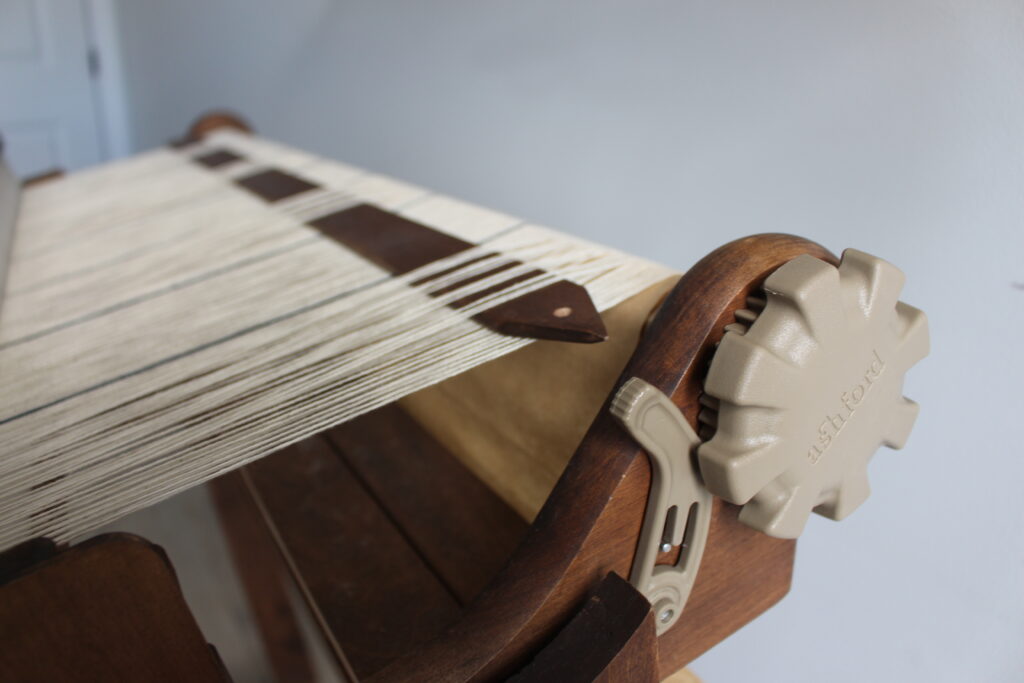
I decided to make my curtains using my rigid heddle loom that is 32” (80cm) wide. If you are looking for the same loom and are in the US, The Woolery has it! Here’s their website: https://woolery.com/ashford-rigid-heddle-loom.html?aff=214
For Canada, it’s available at Tisse et File. Here’s the link: https://www.tisseetfile.com/en/products/metier-a-tisser-rigid-hedge-rh-ashford?ref=MYLENALAROCHELLE&variant=29198243004521
I also used 1 pickup stick to create an interesting pattern. Since that the project is woven using the whole width of the loom, I used a stick that was a bit longer than 32” (80cm). The Woolery also has pickup sticks just like mine. Here’s the link: https://woolery.com/ashford-pickup-stick.html?aff=214
For Canada, it’s available at Tisse et File. Here’s the link: https://www.tisseetfile.com/en/products/baguette-pour-relever-les-fils-ashford?ref=MYLENALAROCHELLE
The Warp
I decided to warp a length of 5 yards (4m60). This is enough to consider for the two panels, the scrap yarn and also about 10” (25cm) for sampling. At the beginning of the project, I knew that I wanted to do a pickup stick pattern, but I wasn’t sure exactly of the pattern that I wanted to make. This is why I allowed a small portion of the warp for testing.
You might want to make your curtains longer or shorter than mine, depending on the size of your window or your personal taste.
Since that the warp is very long, I decided to warp my loom using the indirect warping method. Here’s a tutorial I made that explains it:
I also warped the whole width of my loom, which means 32″ (80cm). I used my 15 DPI heddle and I singled my warp into the heddle.
If you are looking to buy extra heddles and are in the US, the Woolery has them all! You can access their shop through this link: https://woolery.com/weaving/reeds-heddles-raddles/rigid-heddles.html?aff=214
For Canada, it’s available at Tisse et File. Here’s the link: https://www.tisseetfile.com/en/products/peignes-en-nylon-pour-metier-a-tisser-ashford-rigid-heddle?ref=MYLENALAROCHELLE
The Warp Pattern
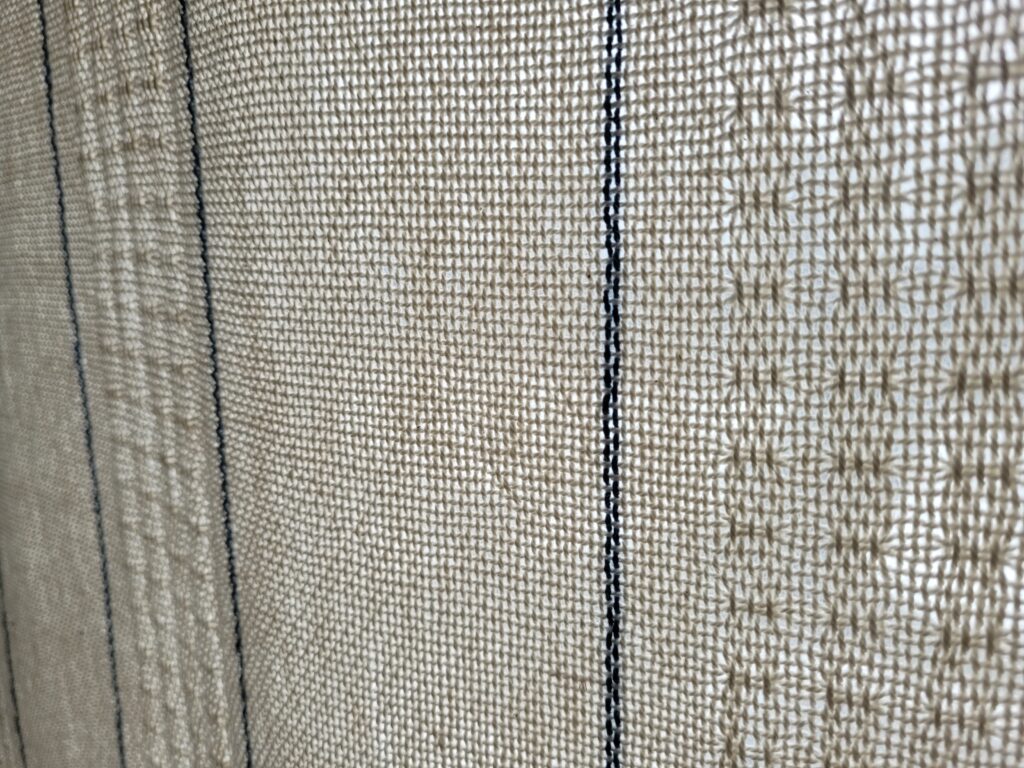
For the warp pattern, I created 8 different sections, all of them separated by a narrow stripe of blue (jeans). This means that there are 7 stripes in total. Each stipe is made out of 2 threads of blue. Each section is 4” (10cm) wide. This means that each section contains 60 ends: 58 ends in the natural color and 2 in the jeans color. The first section on the left has 58 ends of natural and no blue stripe.
Here’s the detailed sequence of the warp:
-58 natural threads
-2 jeans threads
-58 natural threads
-2 jeans threads
-58 natural threads
-2 jeans threads
-58 natural threads
-2 jeans threads
-58 natural threads
-2 jeans threads
-58 natural threads
-2 jeans threads
-58 natural threads
-2 jeans threads
-58 natural threads
The Weft Pattern
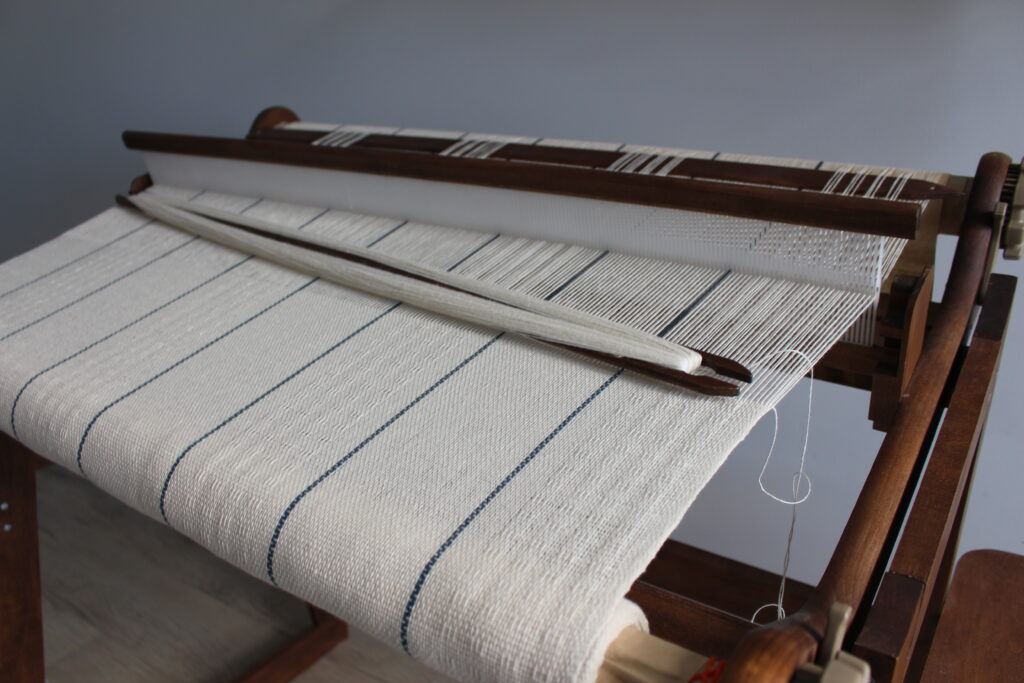
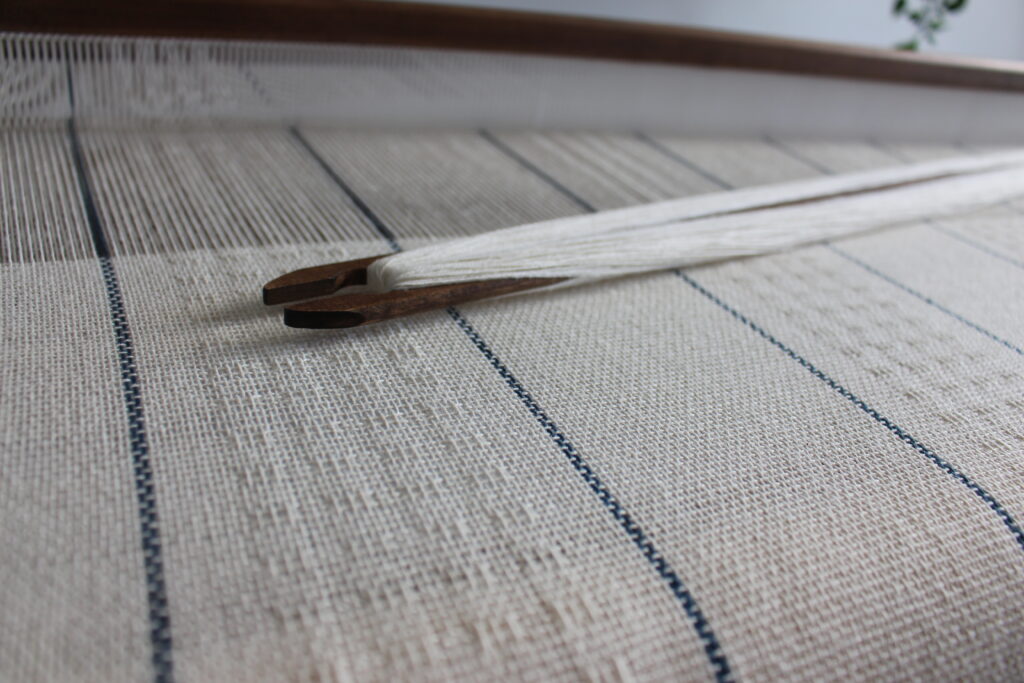
My idea was to have a vertical weft pattern. In other words, I didn’t want to have horizontal stripes. Instead, I decided to do a pick-up stick pattern that covers the whole height of the fabric. When the weaving is done, I will be able to cut the cloth in two, disregarding the pattern and both panels should be pretty identical.
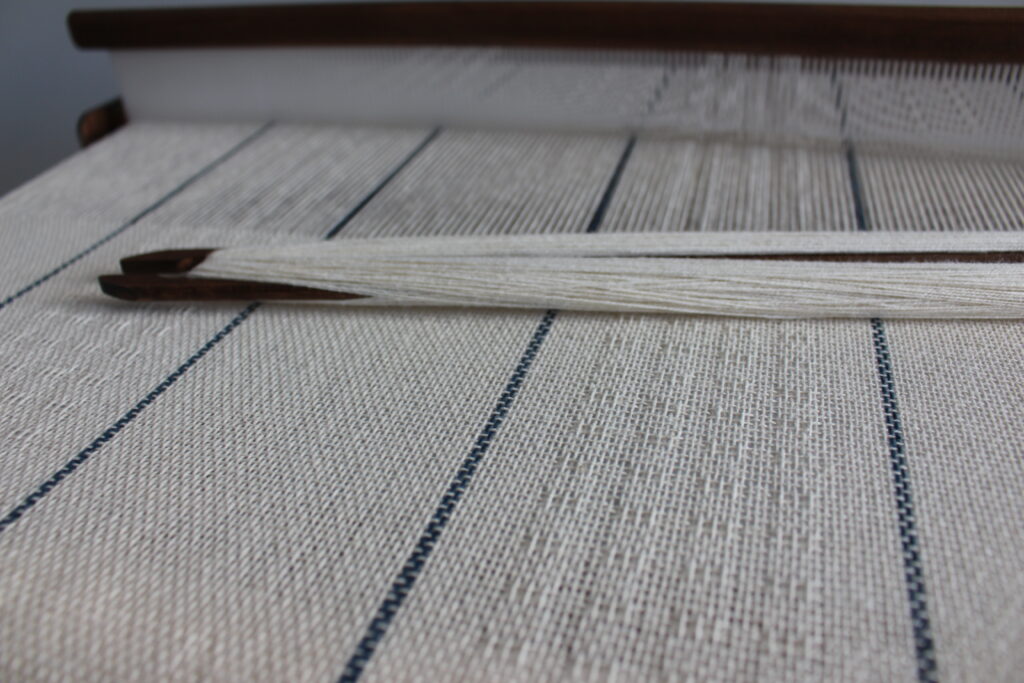
Also, I decided to have the pickup stick pattern in every other section of the warp. Otherwise, I found it to be a bit too busy. This means that I did the pickup stick pattern in only 4 warp sections. Starting from left to right, I did:
-no pattern
-pattern
-no pattern
-pattern
-no pattern
-pattern
-no pattern
-pattern
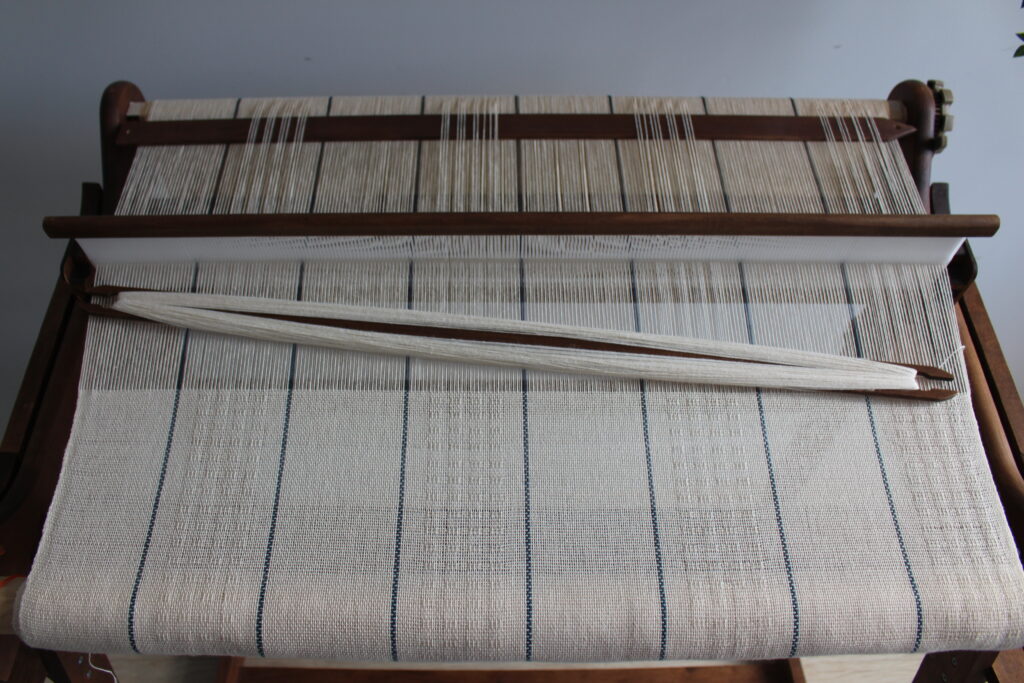
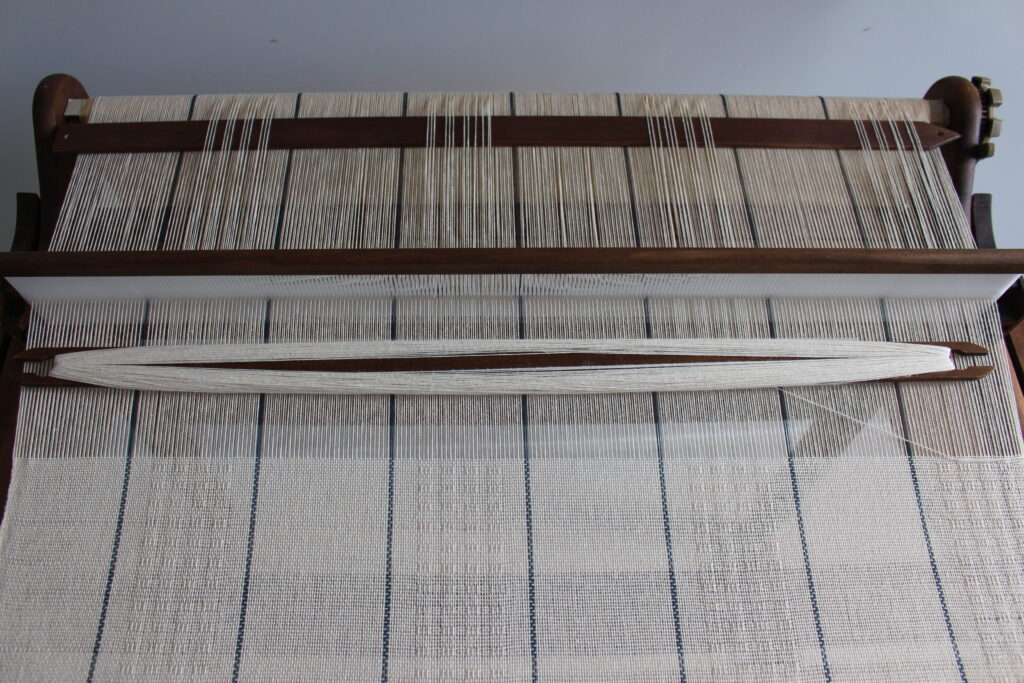
Inserting the Pick-up Stick
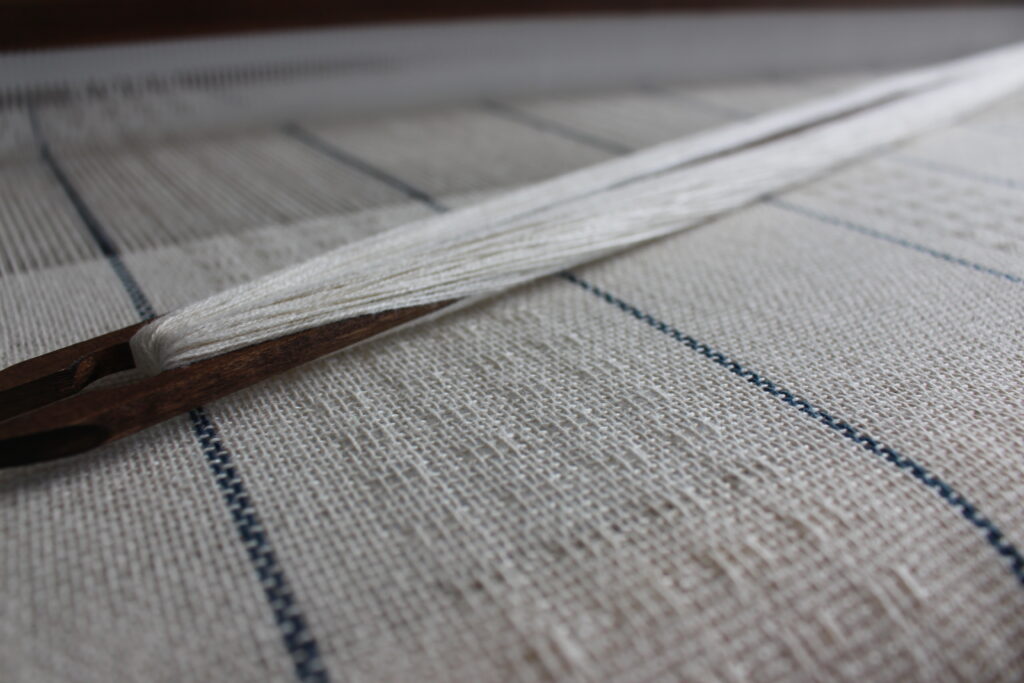
For the pick-up stick pattern, we will look only at the natural threads. Each section has the same number of ends in the natural color, which is 58. The pickup stick pattern can only be done with the threads in the slots. In order to insert it, the heddle needs to be put in the down position. There are in total 29 threads in the slots per section and here’s how I organized them with the pickup stick:
-Skip 6
-Pick-up 3
-Skip 2
-Pick-up 3
-Skip 2
-Pick-up 3
-Skip 2
-Pick-up 3
-Skip 5
Even though the pattern is not exactly centered, this doesn’t really show. It’s a secret between you and I!
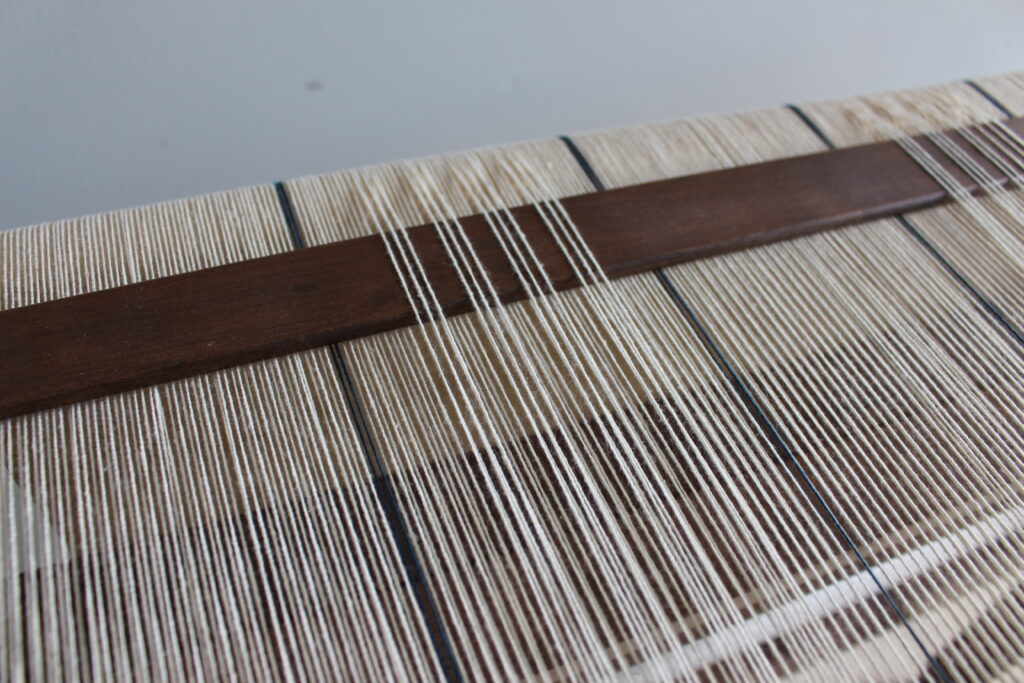
Tip: I find that inserting the pickup stick from behind the heddle can sometime be tiring. Especially when the pattern goes all the way through the width of the loom. For this reason, I do the insertion in two steps.
At first, I insert a pick-up stick in front of the heddle, while sitting (comfortably) down. Then, I put my heddle into the neutral position and I flip the stick on its side in order to lift only the threads that were picked up by it. After that, I insert another pickup stick in the shed created behind the heddle. I can then remove the pickup stick that I inserted in front of the heddle. I will only use the one at the back for the rest of the project!
Weaving the Pattern
The weaving pattern is quite easy. First, I weave 5 normal picks in this order:
1. down
2. up
3. down
4. up
5. down
Then, I put my heddle into the up position and I slide the pick-up stick behind it. This lifts the threads that were picked-up. I then weave the pattern pick.
After that, I can go back to weaving 5 normal picks followed by one pattern pick.
The first and the last normal picks are always made in the down shed. The pattern pick is always done in the up position.
I repeat this sequence all the way through! I weave continually, without making any distinction between the first and the second panel. That will be done once the cloth is off the loom and that I’m ready to make the final touches. So, this is all there is know about the weaving of stunning curtains for my studio
Finishing Touches
Here’s the video where I do all of the finishing touches on the curtains.
In total, I wove a length of about 146″ (3m71). This might seems like a lot of waste since that I warped a length of 5 yards (4.6m). This is due to the fact that I did some sampling and that I cut this sampling off the loom to wet finish it. I then had to reattach the warp, creating more waste yarn.
I wet finished this long piece of fabric and then I cut it half in order to make the two panels. Each panel were 63″ (160cm) long and 26 1/2″ (66cm) wide.
I did the hemming and then I hung them on the window with the help of clips. I’m really happy with how they turned out! Their width and their length are just perfect to cover up the whole window!
So glad to have found your video. I want to try pickup stick pattern for the first time and also make a little curtain for the kitchen door to the garage, so this will be the perfect project to try . Pattern looks lovely, yet doesn‘t seem to be complicated🤔. Thank you for sharing this video❣️
Thank you so much for you nice words! I’m glad my project inspired you. I wish you lot’s of fun trying pick-up sticks 🙂
This is so lovely. I think i will use this inspiration to make a curtain for my small window in the hall. I am thinking about using different colours instead of only blue stripes, we have quite colourful home.
May I ask what size heddle did you use? Do you think it would look nice if I sewed the 2 pannels together to create wider curtain? I have smaller window than yours and also smaller loom ( only 60cm wide ) and I want to hang the curtain only on one side.
Thank you so much! I think that using different colours will surely be beautifull! To answer you, I used my 15 DPI heddle. I’m not sure about the sewing of the two pannels together, because I feel like the seam might show a lot when the light shines through the curtains. But since that I havent try it, I might be mistaken and it might be fine 🙂 If it was me, I would simply hang the pannels side to side.
What kind of clips did you use to hang?
I don’t remember exactly the name of the clips. I found them in the curtain section at Walmart. I hope this helps!
Your curtains are lovely and so evenly woven! The pattern you made with the pick-up sticks is so beautiful, too. Using the lighter color yarn will help bring in lots of light for the room. Thanks for sharing your pattern.
Terry
Thank you so much for your kind comment! I’m so glad you like my projet!