Weaving Rustic Christmas Dishtowels
As I am writing this, the Christmas season is upon us and we can feel the holiday fever settling in! For us weavers, this usually means that we have an urging need to be weaving! This year, I decided to weave a set of two Rustic Christmas dishtowels to give away as gifts for my loved one. I made a tutorial retracing the steps I took from the planning of the warp pattern, to the warping and finally to the weaving of those rustic Christmas dishtowels!
Disclaimer: Links included on this page might be affiliate links. This means that if you purchase a product or service with the links that I provide, I may receive a commission. Please note that there is no additional charge to you. This helps me keep going and create more tutorials.
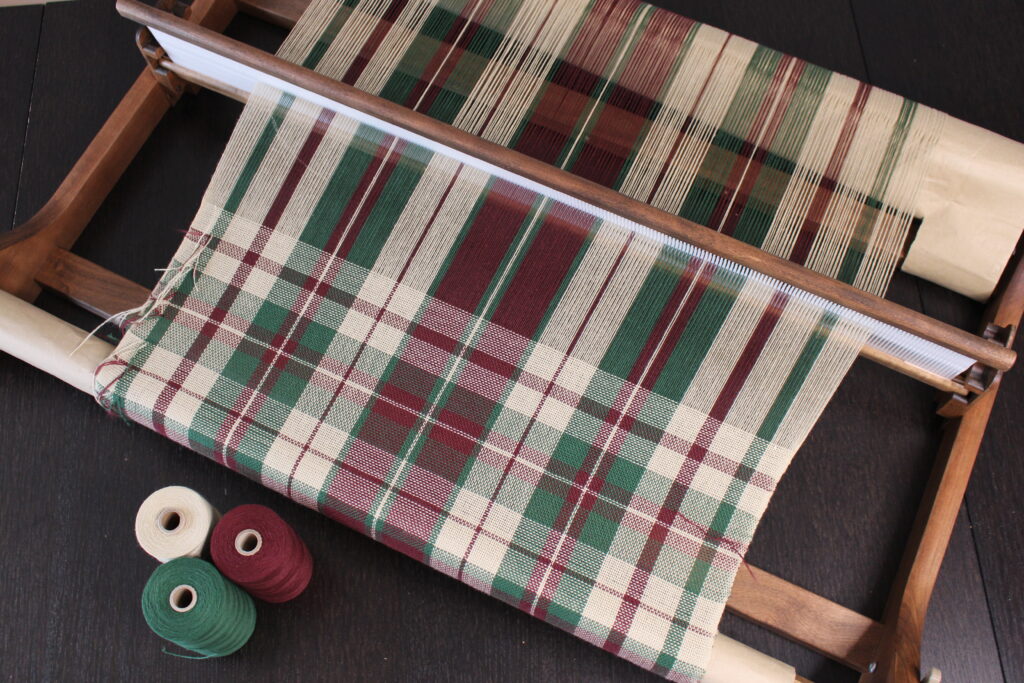
The Materials
As always, I wove this project using my beloved 32” Ashford rigid heddle loom and I used my 15 DPI heddle. For both warp and weft, I used Maurice Brassard 8/2 cotton. The colors I chose are Olive fonce (8266), Ivoire (1451) and Rouge Vin (5115). There are available for purchase through The Woolery Website.
https://woolery.com/maurice-brassard-cotton-yarn-8-2.html?aff=214
For this project, I wanted to have a rustic feel. This is why I chose a more beigy color instead of bright white. I also chose dark green and dark red to also have more of an old-fashioned country side effect.
Planning the Warp Pattern
For those rustic Christmas dishtowels, I really wanted to play around with the chosen colors. Still, I didn’t want the pattern to be random. With the help of excel, I planned it all out before starting warping.
There exists weaving software that can help you plan patterns. However, most of them are not free and some of them are not easy to use at first. This is why I chose to plan my pattern using a Spreadsheet. They are commonly used, and there exists free programs, such as Google Sheets that can be used. Spreadsheets are not perfect, but they work just fine for the scope of my projects.
Calculations
Before going any further, we need to do the math. I wanted the dishtowels to be 24” wide while using my 15 DPI heddle and not doubling the warp threads. Thus, I would get a 15 ends per inch. This means: 24 inches wide times 15 ends per inch equals to 360 ends in total. This project was direct warped. If you are familiar with this method, you will recall that when we warp, we pull loops of yarn through the heddle. Those loops then create 2 threads of yarn. To simplify the use of the Spreadsheet, I took that into consideration. This is why I created 180 columns instead of 360. When warping, I will know that each column is a loop, so 2 threads.
The Color Pattern
I started planning out the color pattern. This is when the fun began! Starting from the middle, I made sure to have an asymmetric pattern. You will notice that I have 3 “blocs” of color: the big one in the middle, and then 2 identical blocks on each side. Then, I separated those blocks of color with the Ivory and splash of the other colors.
Here’s a screen shot of the pattern.

Here’s the threads count from left to right:
18 Ivory, 8 green, 18 Ivory, 8 red, 16 Ivory, 16 green, 6 red, 2 Ivory, 6 red, 16 green, 16 Ivory, 2 red, 16 Ivory, 4 green, 24 red, 4 green, 2 Ivory, 4 green, 24 red, 4 green, 16 Ivory, 2 red, 16 Ivory, 16 green, 6 red, 2 Ivory, 6 red, 16 green, 16 Ivory, 8 red, 18 Ivory, 8 green, 18 Ivory
Getting Warping
Then it was time to set things up for warping. You will notice that I do not use the peg that comes with the loom. I prefer direct warping horizontally. There are many ways to do it. I recommend testing things and see what works best for you. For me, I used what I had on hand, which was a step ladder, a drape pole, heavy books and rubber mats.
I warped for 2.6m (104”). This is enough length to weave two dishtowels of 1m (40”) each and to take account for waste.
Then I just followed my pattern! I let the computer on the corner of the table. For every color, I counted the number of predetermined columns on my file and I warp the same number of loops.
The Weaving
Then it was time for weaving! I finally decided to make the two dishtowels different. The first reason is because I wanted to show you how the same warp can make different and interesting patterns. The second and most important reason is that the first dishtowel required so many color changes that it took forever to weave. I was frankly scared I would not be done by Christmas.
The 1st Dishtowel
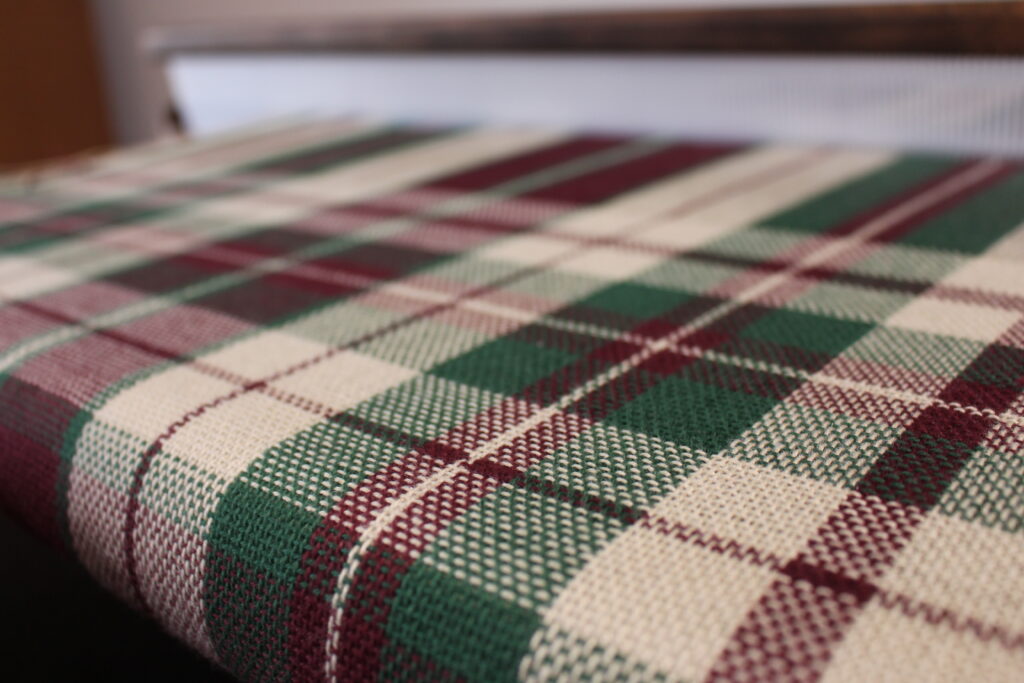
For the first dishtowel that I wove, I tried to go for a pattern similar to plaid. To do so, I did the same strategy as in my tutorial Weaving Plaid. This means that I wove each color that I meet in the warp in the weft. Doing so, I made sure that when the warp and weft stripes meet, that it would make a square. This is because this project is not a balanced weave. This means that I did not have the same amount of threads per inch in the warp and in the weft. So, I just wove until the meeting point made somewhat of a square. Then, I cut the weft yarn and it was up to the next color of the warp.
The 2nd Dishtowel
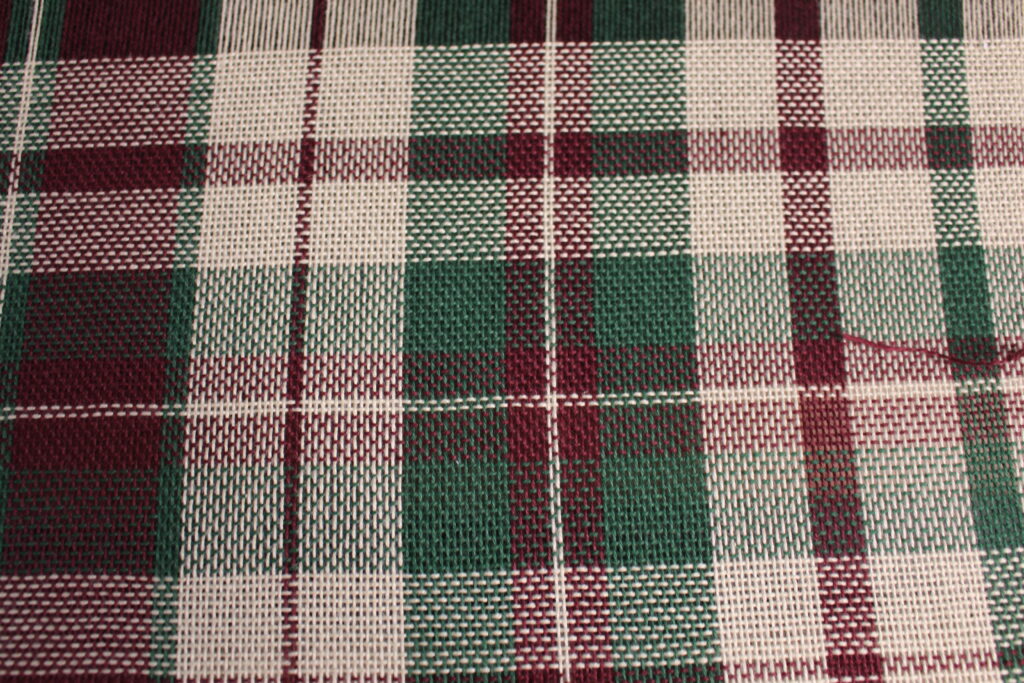
For the second dishtowel, I didn’t want to make as many color changes, but I still wanted to make it interesting. This is why I mainly wove with the Ivory color and a made a block of color at the beginning and at the end of the project. For this block, I repeated the same pattern I had in the middle block of the warp pattern.
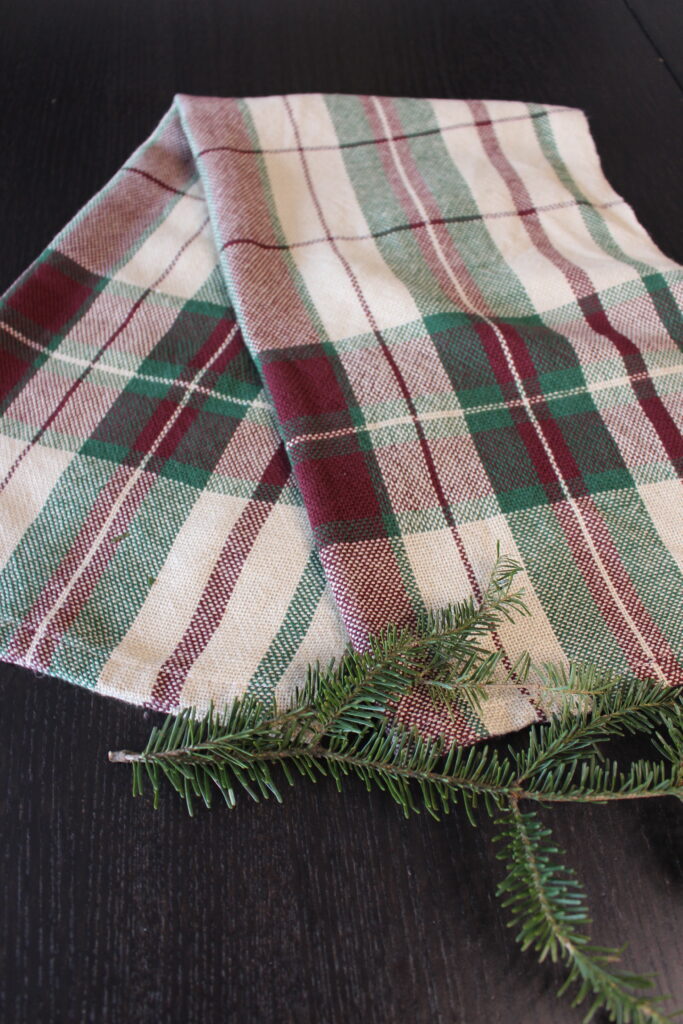
I also added a few rows of red in the body part of the towel. Here are the exact woven dimensions:
6” of Ivory
1 bloc of color (the same pattern as in the middle bloc of the warp) It measured 5”
3.5” of Ivory, 2 picks of red (I repeated this 5 times)
1 bloc of color (the same pattern as in the middle bloc of the warp) It measured 5”
6” of Ivory
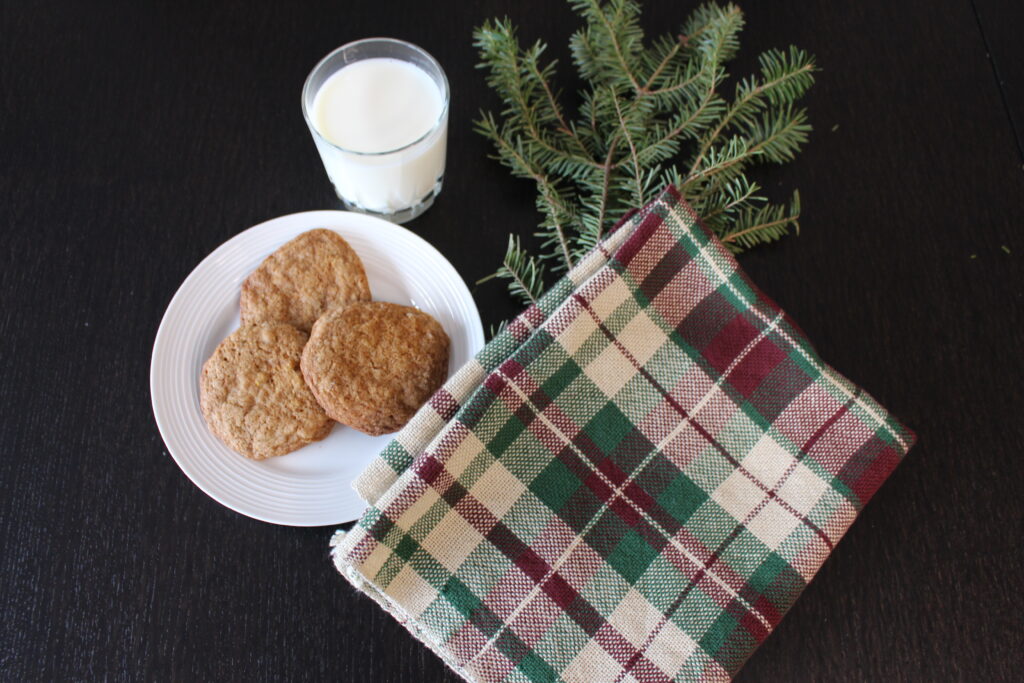
Here’s the final effect! I feel like weaving those rustic Christmas dishtowels really prepared me for the holiday season.
So beautiful and festive!!! Thank you for sharing!
Thank you for your comment!
Is there a loom you recommend that isn’t too expensive. Just beginning to look at starting to learn.
This is a good question. In general, rigid heddle looms are less expensive than other kinds of looms. However, the wider they get, to more expensive they get too. Also, table looms are usually less expensive then floor looms. To help choosing a loom, it’s important to consider what we wish to make. Also, it’s often worth it to look for a used loom to start with.
I just discovered you! Have tried to teach myself rigid heddle weaving on my own with not much free time, but your tutorials are clear and easy to follow. Just put in a big order at the Woolery inspired by you. Thank you!
Thank you so much. I’m happy to know I helped you! I wish you lots of fun weaving!
I’m new to rigid heddle weaving too. So happy to have found your tutorials and videos. I’m inspired by your positive upbeat personality to have fun and enjoy my weaving.
Thank you so much for your comment! I’m so glad I was able to help.
Merci pour votre patron de linge à vaisselle de Noël. Vos informations sont très pertinentes et faciles.
Merci à vous!
Beautiful work. I am inspired and have ordered the cotton in colors you used. Thank you for your detailed instructions. I have a question about finishing the sides of the towel since you have cut off your color changes rather than weaving in the ends. Did you machine hem the sides of the towel as well as the top and bottom to secure the edges?
Hello and thank you for you nice comment! Actually, I did weave in my ends while I was weaving. When I change color, I always let a bit of the thread out and I cut it after wet finishing. This is probably why it seems like I did not weave them in. This means that I did not need to hem the sides of the towels, as it was already secured. For the top and the bottom, I did have to use the machine the hem them. I hope this helps!
Thank you for your detailed reply I appreciate the instruction. I have my yarn and I am ready to warp.
You are welcome! I wish you lots of fun with this project.
I’m curious. How much did they shrink in the wash? The normal sett for 8/2 cotton is a minimum of 20. They look wonderful!
They shrank for about 10%. I find your comment really interesting. I have heard different opinions about the best sett the be used for 8/2 cotton. For this project, as I’m weaving plain weave, I don’t mind having an EPI under 20. This gives nice thin towels that are my family’s favorites. I believe that it often comes down to personal preferences. If one prefers thick towels, I would suggest doubling the 8/2 cotton in a 10 or 12 DPI heddle. Thank you for bringing this subject up! 🙂
What kind of yarn did you use for both the warp and the weft? They look like carpet warp.
Just discovered you off of Pinterest, looking forward to checking out the posts.
Hi! I used 8/2 cotton for both warp and weft. This cotton yarn is perfect for making dish towel!
I’m going to make these on a standard floor loom. Love your colors and plaid design. I’ll use the same design and some yarn from my stash. Goodness knows I need not buy more yarn! Thank you!
That’s great! Hahah, I understand you so much! I wish you lot’s of fun weaving those 🙂
i je vais faire ce beau patron pour cadeau des fêtes prochaines merci pour vos conseils
a+sara
C’est super! Bon tissage 🙂
Hello, i love this pattern and the Colors. Is there anyway of getting the Excel spreadsheet you used? I’m not very good with spreadsheets.
Thank you!
[email protected]
Thank you! I have looked through my old folder and it seems like I have misplaced the Excel file. I’m really sorry. However, I give the exact thread count on this page, so you should have all the info you need to warp this pattern. Also, I have made a video in which I explain how I use spreadsheets to plan patterns. I thought you might find it useful and here’s the link: https://curly-n-yarny.com/planning-warp-pattern-using-spreadsheet/
Love the colours. I was wondering about your EPI as well as I have used 20 EPI for the towels I have made. Will have to try the 15EPI.
Thanks
Thank you! I’m using a 15 EPI for this pattern and it gives thin towels, which I love. And you are right, we often see towels woven in plain weave with a 20 EPI. In this case, I believe it would be possible to have 20 EPI while doubling the warp threads in a 10 DPI heddle. The pattern might simply need a few adjustments though.
I count 362 ends. I’m using my 24″ ashford rigid heddle loom with a 15 dent reed. That reed only gives me 360 ends total. Is my math wrong? I love the color sequence you choose. I’m not a fan of bright white as I have iron in my well water and it puts yellow stains on bright whites.
You are right. I wove this project using my 32″ loom, and I might have warped a few threads extra since that my heddle is a bit wider. In order to adjust the pattern for your loom, I would recommend removing a few threads in some Ivory sections. Since that the pattern in symmetrical, you would have to remove the threads in two sections. If you are direct warping your loom, this would actually mean to remove two loops, so 4 threads total. By doing so, you should end up with 358 ends. In between the green and the red stripe, on both side of the towel, the pattern asks for 18 threads of Ivory. There, I would warp for 16 threads instead. I hope this makes sense. Please let me know if you have any other questions 🙂
Ce projet est très intéressant! mais serait-il possible de faire des vidéo en français étant donné que mon anglais laisse à désirer et que je suis convaincu que je ne suis pas la seule 😉
Présentement, je n’ai pas la capacité de faire beaucoup de vidéos, mais c’est définitivement dans mes projets! 🙂
Coucou ! 🙂
Tellement un beau projet. Merci pour les instructions.
Je suis curieuse de savoir comment tu t’y prends pour faire séparer les deux dishtowels ? Tu laisses un espace et tu coupes ? Tu utilises la machine à coudre ensuite pour les bouts ? (dsl je ne connais pas les bons termes hihi) Ma difficulté est vraiment dans la finition…
Merci ! 🙂
I made these towels this month. Your pattern was so amazing. I made nine towels which make great gifts!
Thanks
Jane
How can I convert this rigid heddle pattern to a 4 shaft baby wolf loom.